After reading this article on using Edge DX’s database and how we can store additional data in it, I thought that I would see if I could use Edge DX to store environmental data obtained from a sensor attached to a VDI client in my computer lab. In this article, I will walk you through how I used an inexpensive VDI client, attached an external sensor, and used Edge DX to store and retrieve that data.
The Setup
I have a Raspberry Pi (RPi) based VDI client that I use in my lab, and before delving into the Edge DX aspect of this article, a little background information on RPis would be helpful.
Developed by the Raspberry Pi Foundation, RPis are fascinating devices as they are low-cost, Arm-based single-board computers (SBCs) that range in price from $5 to $80. For $5, you get an RPi Zero with a single-core Arm processor and 512MB of RAM. On the upper end, you can get an RPi 4 B+ with a quad-core Arm processor, 8GB of RAM, Bluetooth, and wired and wireless Ethernet for connectivity. For this article, I will use one in the middle of the range: the RPi 3 B+, which has a quad-core processor, 1GB of RAM, wired and wireless Ethernet, and retails for $35.

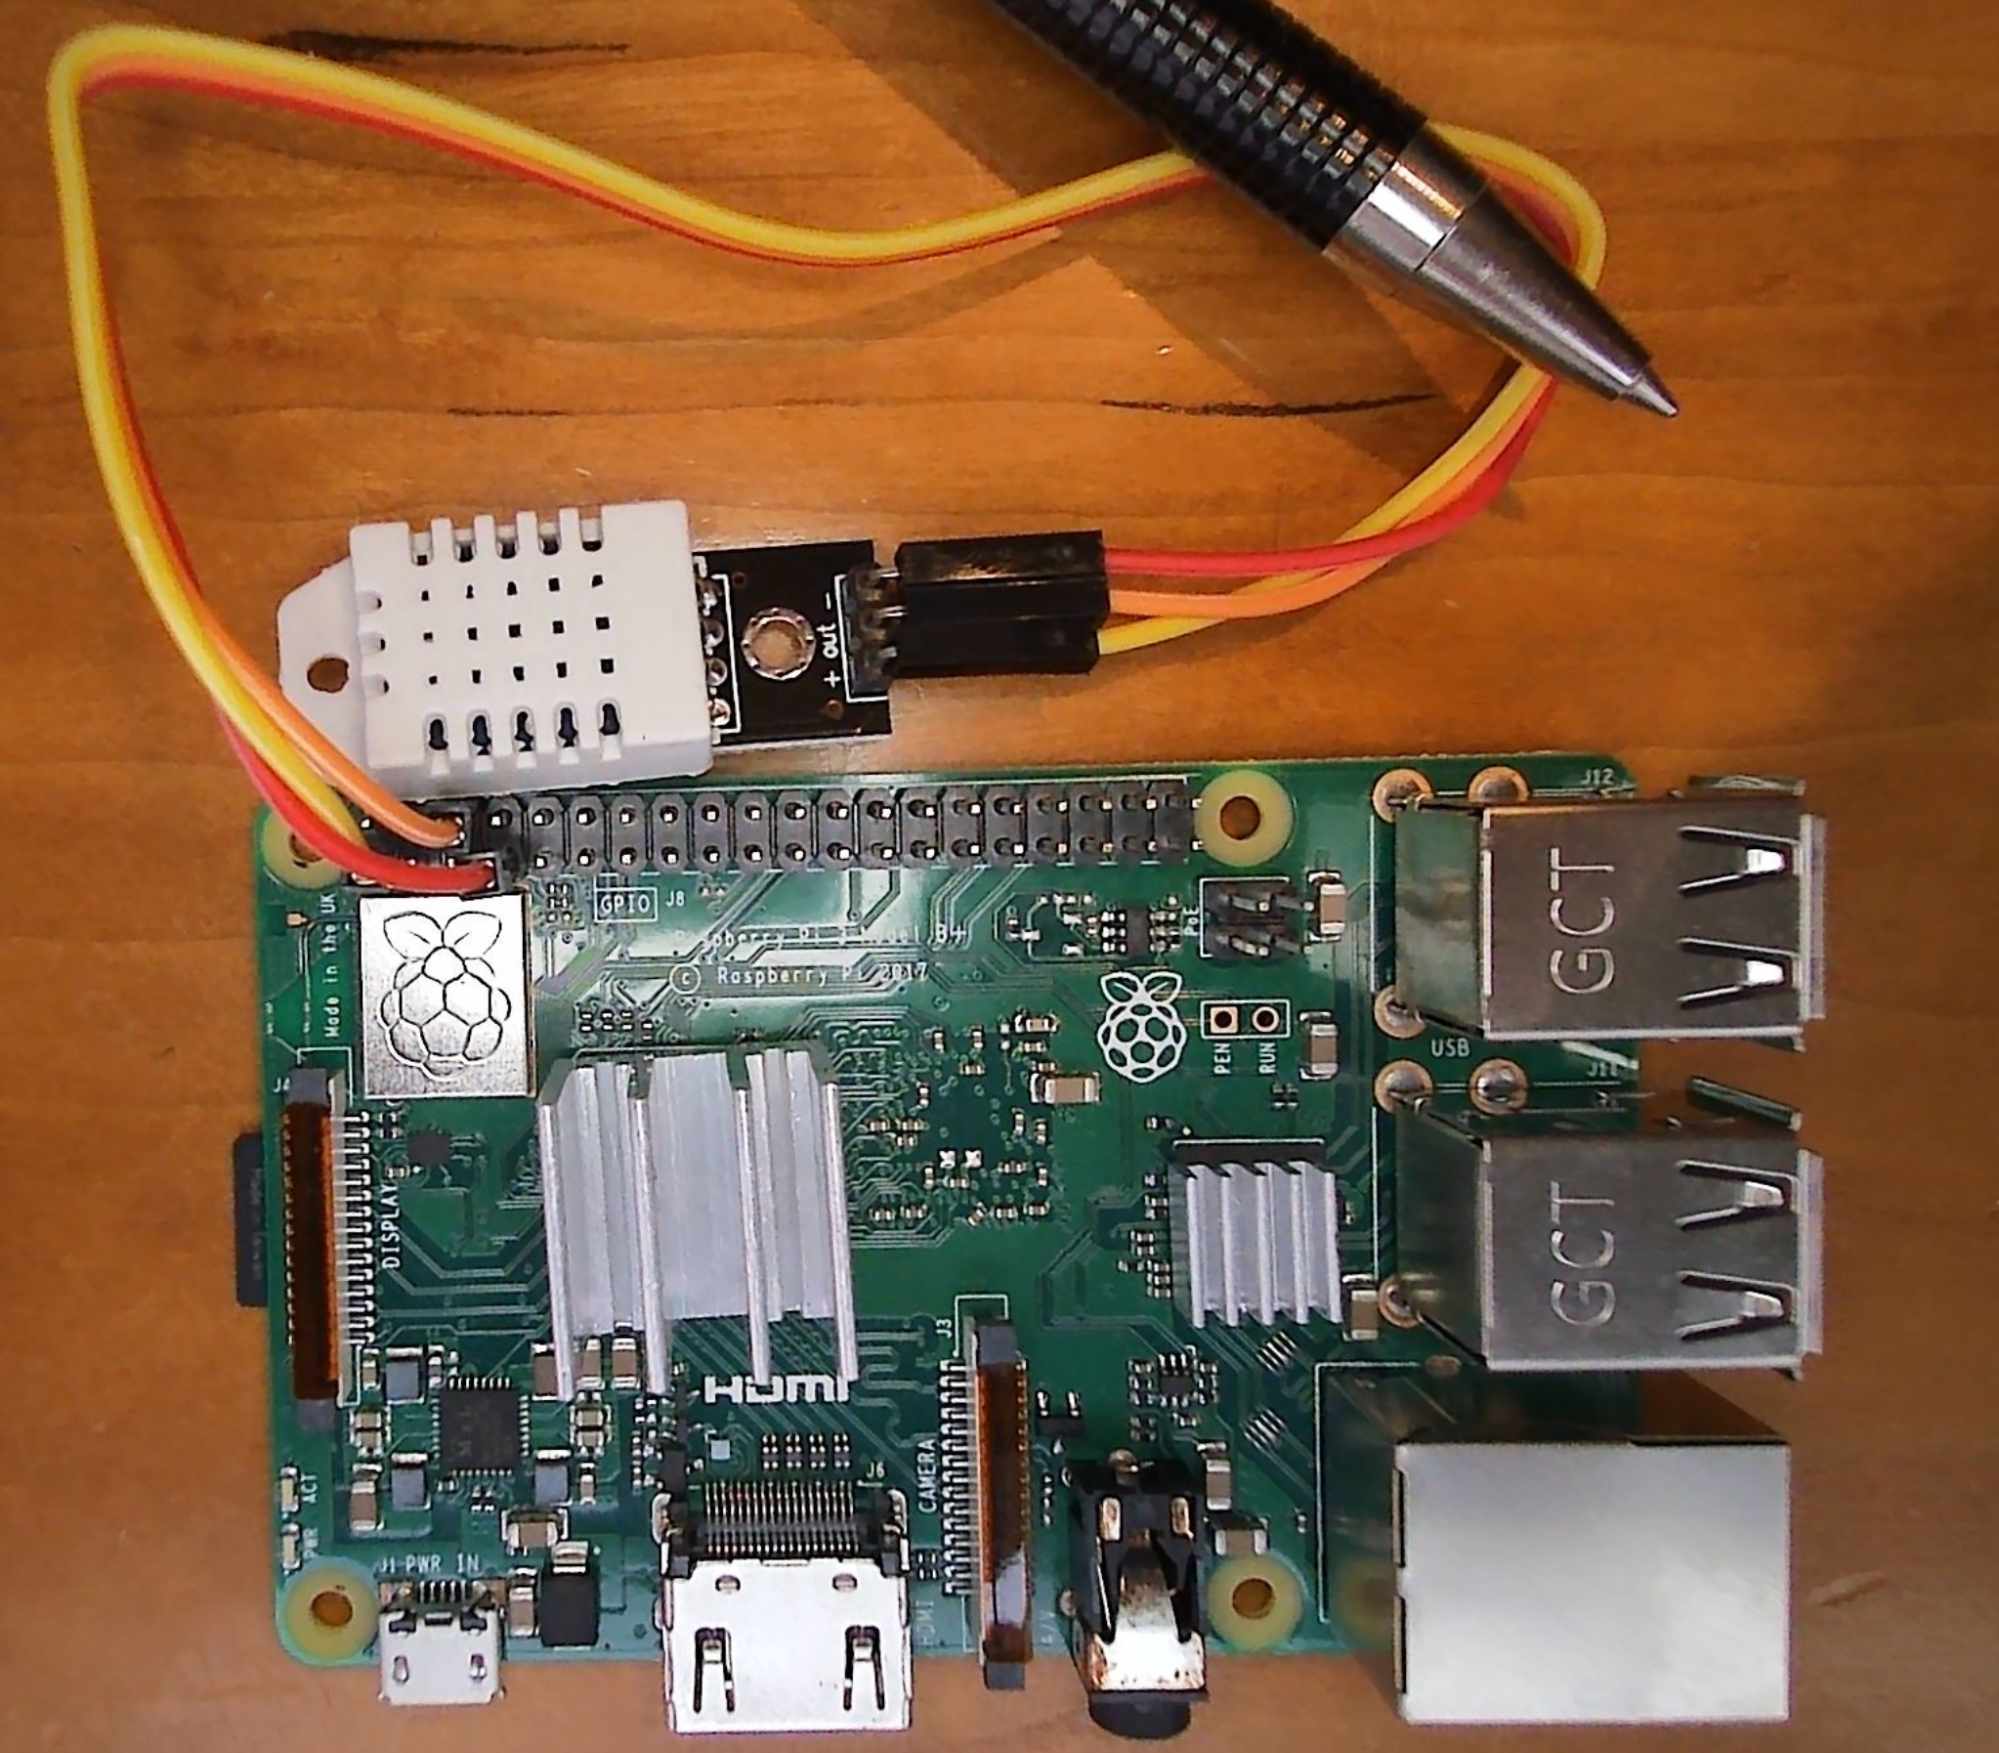
What is essential to understand for this article is that RPis was developed to give students a hands-on device to learn basic computer science. For this reason, they have a very open and expandable architecture with a 40-Pin GPIO Header that allows sensors to connect to them. I used the GPIO to attach a temperature and humidity sensor to the RPi using three GPIO pins. You can read more about how I did this in my Virtualization & Cloud Review article.

The sensor, a DHT22, costs $6 and can transmit data every 2 seconds, and below are its specifications:
| Temperature Range | Humidity Range | Temperature accuracy | Humidity Accuracy | Speed | |
| DHT22 | -40°-80° C | 0-100% RH | +/- 2° C | +/- 2-5% RH | 2 S |
RPis have a passionate following, and many people and companies have created code and code libraries for their interfaces to them. To gather information from the device, I used the DHT Python library developed by Adafruit. Then I modified a sample program from Adafruit to collect data from the DHT22 to report the temperature and humidity. You can obtain the sample program from my GitHub repository.
Below is a sample of the output from my code:

The Integration
Once I had the RPi set up with a sensor and the code to read the sensor, I could begin integrating it with Edge DX. My end goal was to write the data to the Edge DX database, but first, I wanted to execute the script in Edge DX and see the output under the Device Events tab.
To do this, I needed to put the output between ### SIP EVENT BEGINS ### and ### SIP EVENT ENDS ### statements. When I ran the script, this is the output that I saw:

At this point, I had to decide whether to keep the Python code on the RPi or bring it up to my Edge DX script library to store it.

If I moved my Python code up to my Edge DX script library, I could run it on any device in my environment; however, to prevent it from inadvertently running on devices not equipped with a DHT22 sensor, I opted to keep it on the local device.
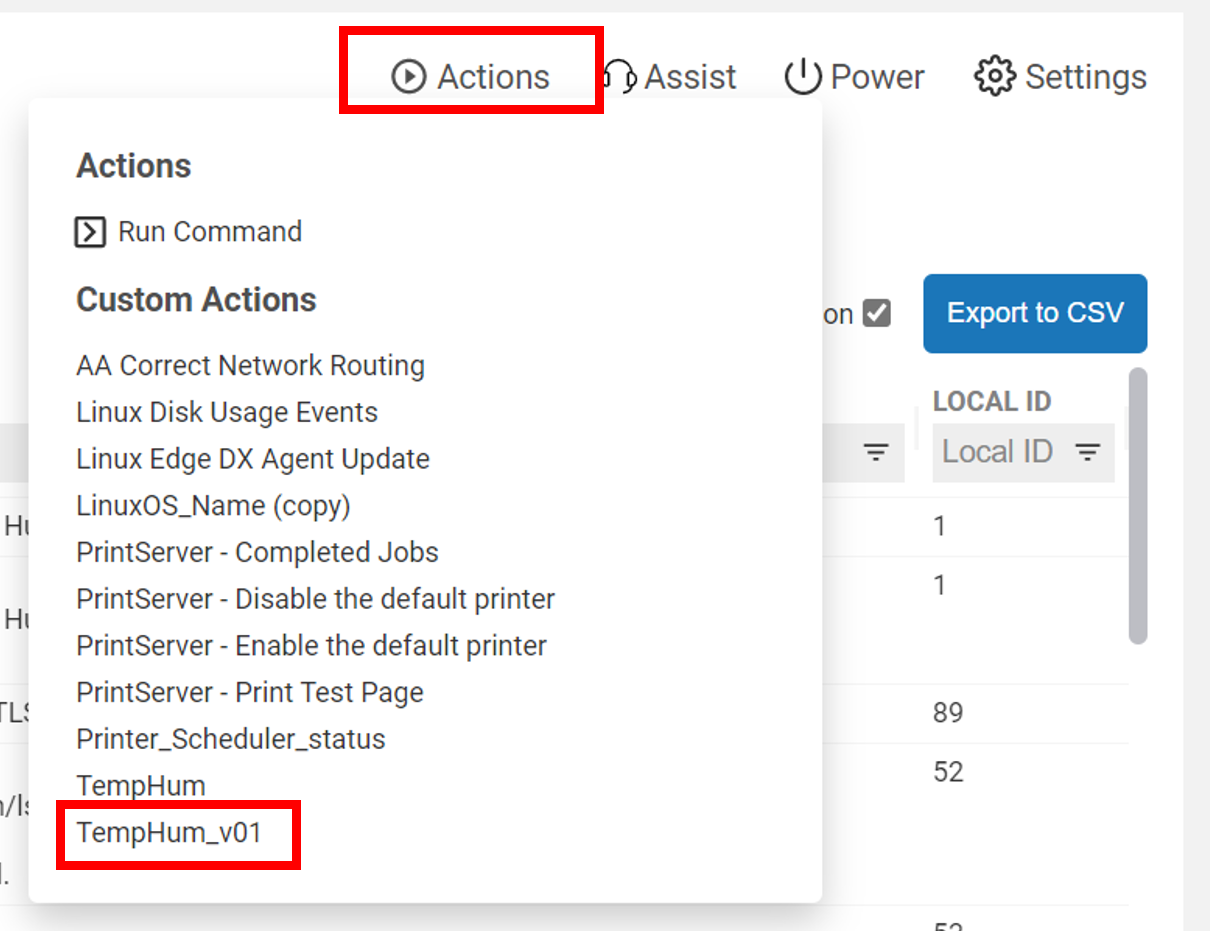
I still wanted to execute the code from Edge DX, so I created a two-line Bash script on Edge DX to run it called TempHum_v01 that contained the following lines of code
#!/usr/bin/bash
/usr/bin/python /home/pi/TempHum.py
You can read this article for more information on scripting in Edge DX.
I then executed the script in Edge DX by selecting the script under the Actions drop-down menu.

The output in Device Events was as expected.

Saving the Data
I wanted to write the output to the Edge DX’s database to have a permanent record. I can use this data for trending and correlation purposes; if the servers in my lab went down, I could use it to determine if it was temperature related. To do this, I needed to wrap the output between ### SIP DATA BEGINS ### and ### SIP DATA ENDS ### and write the output in a JSON format, so I used the Python json.dumps() function from the jsonlib module. Below is what the output looked like when I ran the script from the command line:

I then modified my script in Edge DX to write to the database by selecting the Sends Data checkbox and entering a name (i.e., EnvTempHum) in the Data Index text box. I didn’t need to include a timestamp for the data or the device it came from, as it was automatically created when the script ran.

The output was also written to Device Events, as I kept both the SIP EVENT and the new SIP DATA codes.

I selected Data from the Configuration drop-down menu to see the database’s data.

I then selected the envtemphum from the list of indexes. Keen observers will notice that I entered EnvTempHum on the text field, but Edge DX converted it to lowercase.

I selected the columns that I wanted to display from the index schema.

Your Permanent Record
I had no intention of running the script manually every time I wanted to collect the data, so I went back to the script and, from the Trigger drop-down menu, changed it from Custom Action to Long Interval Timer.

My long interval was currently set to every 600 seconds or 10 minutes, so I changed it to every 1800 seconds or 30 minutes. You can see what your timers are set to and change them by going to Configuration > Settings > Agent > Long Trigger Interval (seconds).

After a few days, I examined the data again and saw that it did collect the data every 30 minutes.

I then created a report to pull the data whenever I wanted.

Alert Me!
It occurred to me that I didn’t want to constantly keep an eye on my reports to detect when my lab got too cold, hot, or humid, so I created an alert to email me when the temperature got above 85°F or below 50°F below, or if the humidity became greater than 70%.
To create the alert, I selected Alerts from the Configuration drop-down menu and then selected Add Alert.

In the alert wizard, I selected envtemphum from the Data Index drop-down menu and then specified the temperature and humidity conditions that would trigger an email alert. It should be noted that the conditions are ANDed together, so I needed to set up three different alerts to check for each condition.

Now I am emailed when the lab has an issue.
A Cheaper Solution
Once I had this solution, a coworker asked me about setting up a pure monitoring solution for their lab as they didn’t have a VDI client in their lab. I suggested we use a RPI Zero 2 for only $15. With the sensor, it came to $21!

The Zero 2 W has a quad-core Arm processor, so he has some exciting plans to use its excess CPU and IO capacity for other lab-related activities, such as using an electronic relay hooked up to it to remotely boot one of a server that he only uses occasionally. He also found he could use other Edge DX features, such as remote rebooting with RPi’s.

I will be the first to admit that the above is a tortured example of using the Edge DX database. Still, I do think that it points out a few sanguine points about Edge DX: it is effortless to write additional data to its database, and even if the data is collected from non-traditional sources (i.e., if it can be acquired from a device, it can be written to the database); it is easy to create a report from any data; and finally, that data can be used to set off alarms when they reach specific thresholds.
You can read more information about scripting and using Edge DX’s database here, and you can find more information about Edge DX on ControlUp’s web page.