ControlUp ControlUp for Compliance provides security teams with comprehensive and unparalleled end-to-end visibility for all the devices in your environment. This level of visibility allows for a thorough assessment of an organization’s security posture and exposure, empowering IT to understand and improve their current security landscape. This solution is crucial for proactive risk management, enabling organizations to navigate and mitigate threat exposure across their entire attack surface.
Contrary to what you might think, implementing a sophisticated and comprehensive solution like ControlUp for Compliance is not time-consuming or complicated. Based on your past experiences, you may expect that it will take hours to implement a solution like ControlUp for Compliance and then wait days or weeks to start seeing the benefit of it. You would be wrong. Many of our customers have reported that they can implement ControlUp for Compliance in just a few minutes and start seeing actionable results in under half an hour, making you feel efficient and productive!
So don’t be intimidated by ControlUp for Compliance’s power. It is user-friendly and straightforward to use. Let me guide you through my first-hand experience with it on day one.
For those unfamiliar with ControlUp for Compliance’s benefits and capabilities, it’s suggested that you read Eldad’s blog before proceeding with the walkthrough.
Get Up and Going in Five Minutes
One of ControlUp for Compliance’s key advantages is it’s a SaaS application, eliminating the need to set up and maintain any infrastructure in your environment. Simply choose the devices you wish to protect, and a step-by-step wizard will guide you through the rest. It’s as easy as that!
Like other ControlUp products, ControlUp for Compliance is accessed via an icon in the left navigation pane. Clicking this icon will bring you to a dashboard that gives you a high-level overview of your environment’s security posture. This overview is based on data collected on the devices in your environment that have the Edge DX agent running on them.
I set up a very small environment for this article (only ten devices), but ControlUp for Compliance supports tens of thousands of devices. Even with my small environment, you will see many security-related issues that should be addressed.

To start a trial of ControlUp for Compliance, click the Start Trial button on this page. If you don’t see this button, contact your ControlUp salesperson.
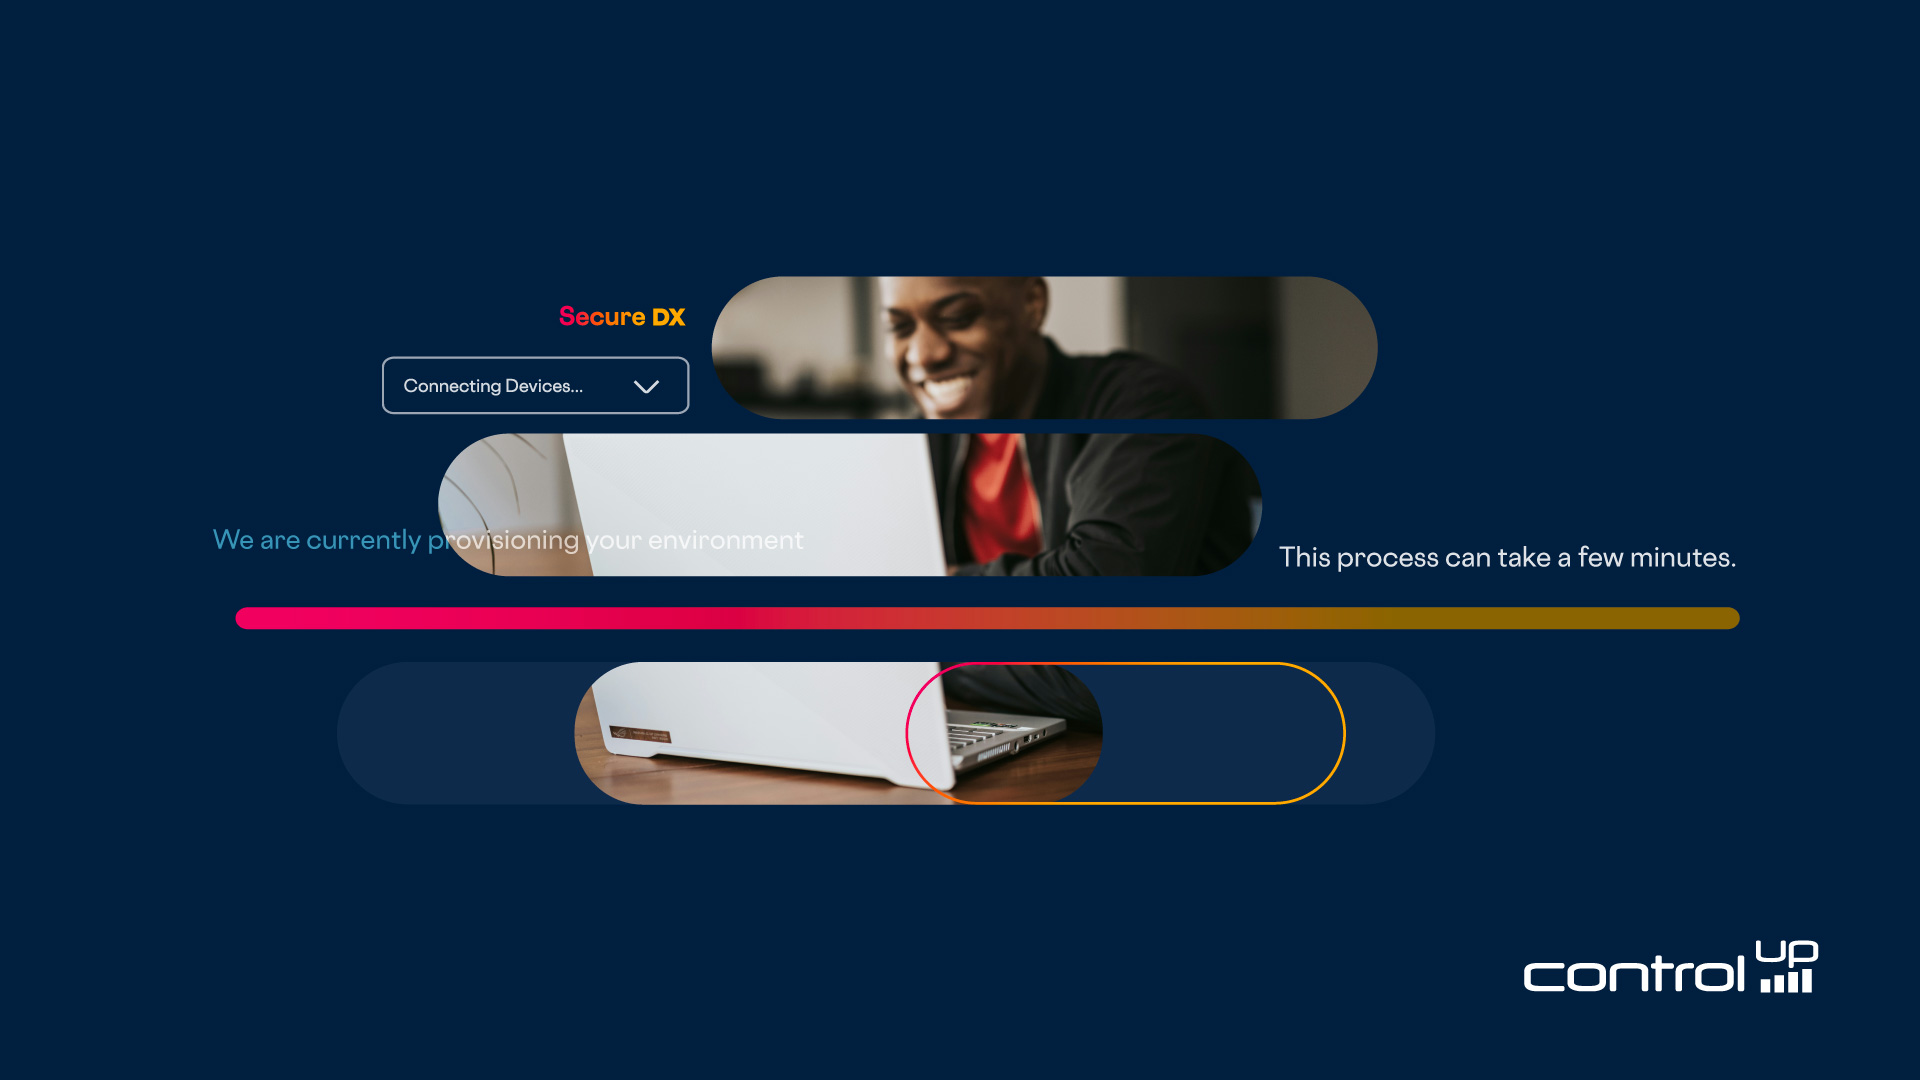
This will start the provisioning of your ControlUp for Compliance tenant.

Provisioning your ControlUp for Compliance tenant may take a few minutes, depending on a few factors.
Once your tenant has been provisioned, a wizard will walk you through the rest of the process of setting up ControlUp for Compliance.
Selecting Devices
The first step in this process is selecting the devices for which you want to deploy the ControlUp for Compliance agent. As ControlUp for Compliance works with machines enrolled with an Edge DX tenant, it automatically populates a drop-down menu with the devices and device groups from it. Although you are probably anxious to get started with ControlUp for Compliance and deploy it on all the devices in your environment, I suggest you only work with a small subset of machines to become familiar with it before deploying it more widely. Don’t worry about adding more devices later; it is easy.
I like to use device group tags to identify the subset of machines on which I will first deploy it. This can be done in Edge DX. As this is a trial, you will be limited to 50 devices.

When you click Connect Devices, the agent will be deployed on the devices. It may take a minute or two for the agent to be deployed.
Setting Up a Scanning Template
You will then be presented with a dialog where you can select the out-of-box scans and remediation options to run on the devices. You can also choose to create a custom template. I strongly suggest using the preconfigured one and verifying that remediation is turned off.
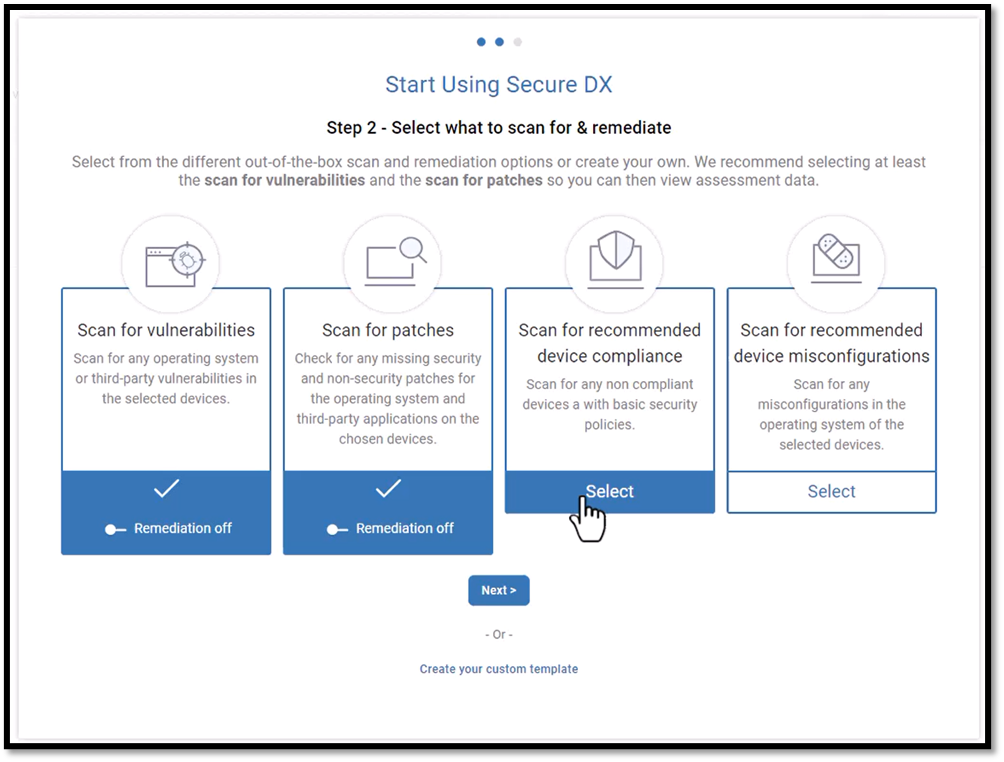
You will then be asked to give the template a name and whether you want to schedule the scan or run it immediately. I know you are excited to start with ControlUp for Compliance, so I suggest you select immediately unless the devices run mission-critical workloads or are CPU—or memory-constrained.

If you select immediately, the scan will start on the devices when you click Create Template.

Once the scan is completed (it will take a few minutes), you will be presented with a dashboard showing the issues on your devices. In the lower right corner of this dashboard, you can see that 1517 security-related issues have been identified!
You may be overwhelmed by the number of issues you see, but don’t be. We categorize these issues to make it easier to identify them and use smart prioritization to help you identify the most pressing issues.

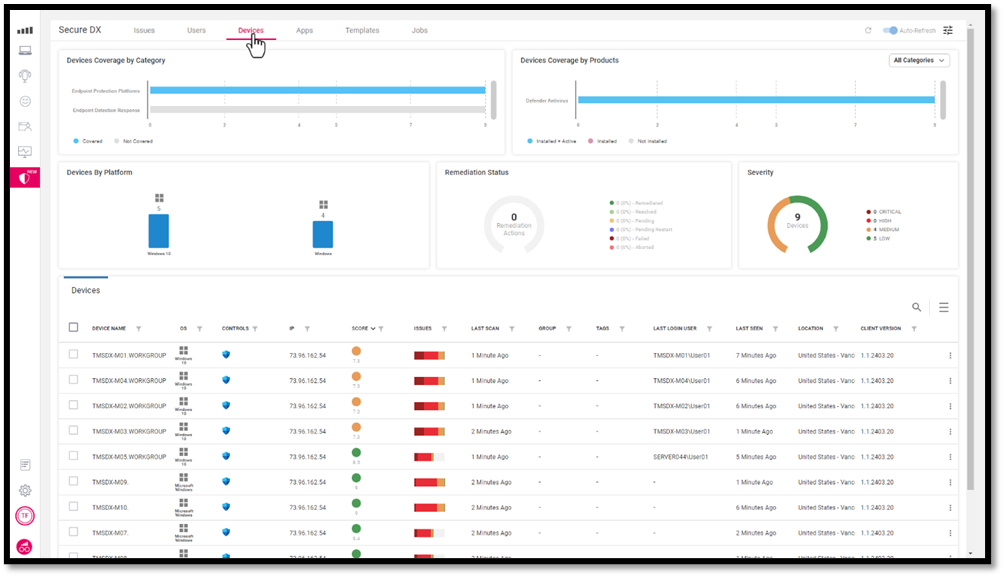
After the Scan
Tabs are used to navigate between ControlUp for Compliance’s various dashboards. Each dashboard has widgets at the top that give a high-level overview, while a grid provides a detailed breakdown of the information discovered by the scan.
By clicking their name in the grid of the Users dashboard, you can see issues a particular user is having on all the devices they are using.

Likewise, you can see the issues affecting a particular device from the Devices dashboard.
The Applications dashboard shows you issues about the applications running on the devices in your environment.

Correcting Issues
Knowing you have security-related issues is good, but correcting those issues is better.
For example, the application’s dashboard showed that the version of Notepad++ that we are running in our environment has a score of 0.7, is classified as a critical security issue, and has 7 CVEs filed against it.

By clicking on this application, we get more information about it.

Of particular note is that four devices are running version 8.0 while the latest version, shown in the left pane, is 8.6.4. We can click the CVEs and version tabs to see more information.
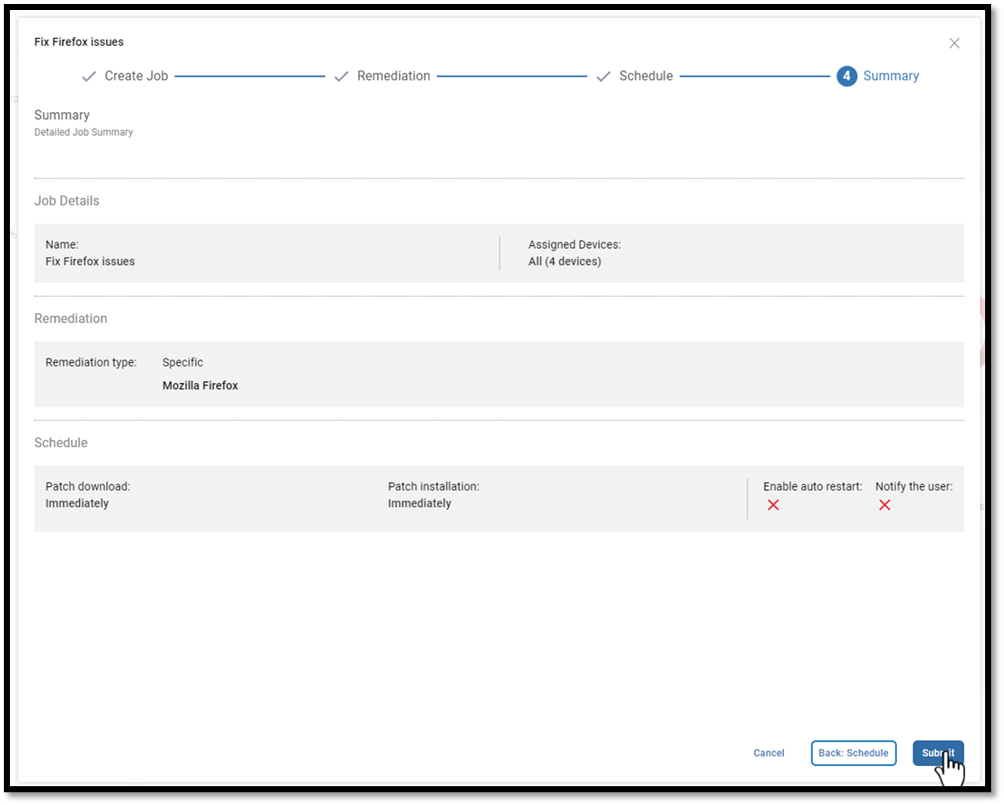
Selecting the devices and choosing Remediate from the Actions drop-down menu will bring up a wizard to correct this issue.

This wizard will create a job to remediate the issue by installing the latest version of Notepad++ on the devices.
I chose to do this immediately, but I could have scheduled it to take place off working hours.
Once the devices were updated, it was shown on the dashboard, and the issue was no longer seen in the app’s dashboard as an issue.

In less than an hour, I deployed ControlUp for Compliance, scanned the devices in my environment for issues, identified over 1,500 security-related issues, and corrected a critical security issue on multiple devices using a wizard.
In this short blog, I just showed you the tip of the iceberg regarding the power of ControlUp for Compliance and how it gives you complete device visibility for comprehensive security assessment and proactive risk management across an organization’s desktops.
My next blog will show you how to create a template from scratch, schedule the scans, and automatically apply remediations.
Click here for more information on ControlUp for Compliance or any of our other award-winning products or to schedule a personal demo.