ControlUp is an invaluable technology when monitoring, troubleshooting and remediating IT issues in a timely fashion. These capabilities provide value to organizations by reducing the number of help desk tickets that IT departments need to work through, and providing the means to close existing help desk tickets faster. This all leads to an improved overall user experience for the IT department and the end user. ControlUp supports all the major physical and virtual environment platforms like Citrix, VMware and Microsoft. This blog will focus on Windows 365 Cloud PC in a Hybrid Active Directory (AD) environment.
Depending on which Windows 365 Cloud PC you choose will require a different ControlUp product to monitor your machines for maximum effect. For Windows 365 Business or Azure AD joined Enterprise machines, ControlUp for Desktops provides excellent performance monitoring, remediation automation and troubleshooting coverage of these devices. For Hybrid AD joined Windows 365 Enterprise machines, ControlUp’s Real-Time DX product can provide real-time performance metrics, automation and troubleshooting capabilities for these devices.
Curious to learn how you can package the ControlUp for VDI Agent for distribution through Intune to your Windows 365 Enterprise Hybrid AD joined machines? Let me walk you through the steps that show you how. You can start by watching the short video below.
Microsoft provides documentation you can follow for producing a package to distribute through Intune. This article will refer to that documentation which is current as of July 2023.
To start, download the Microsoft Win32 Content Prep Tool and the ControlUp for VDI Agent installer from the ControlUp Download Center.

Figure 1: Download the Microsoft Win32 Content Prep Tool (IntuneWinAppUtil.exe).
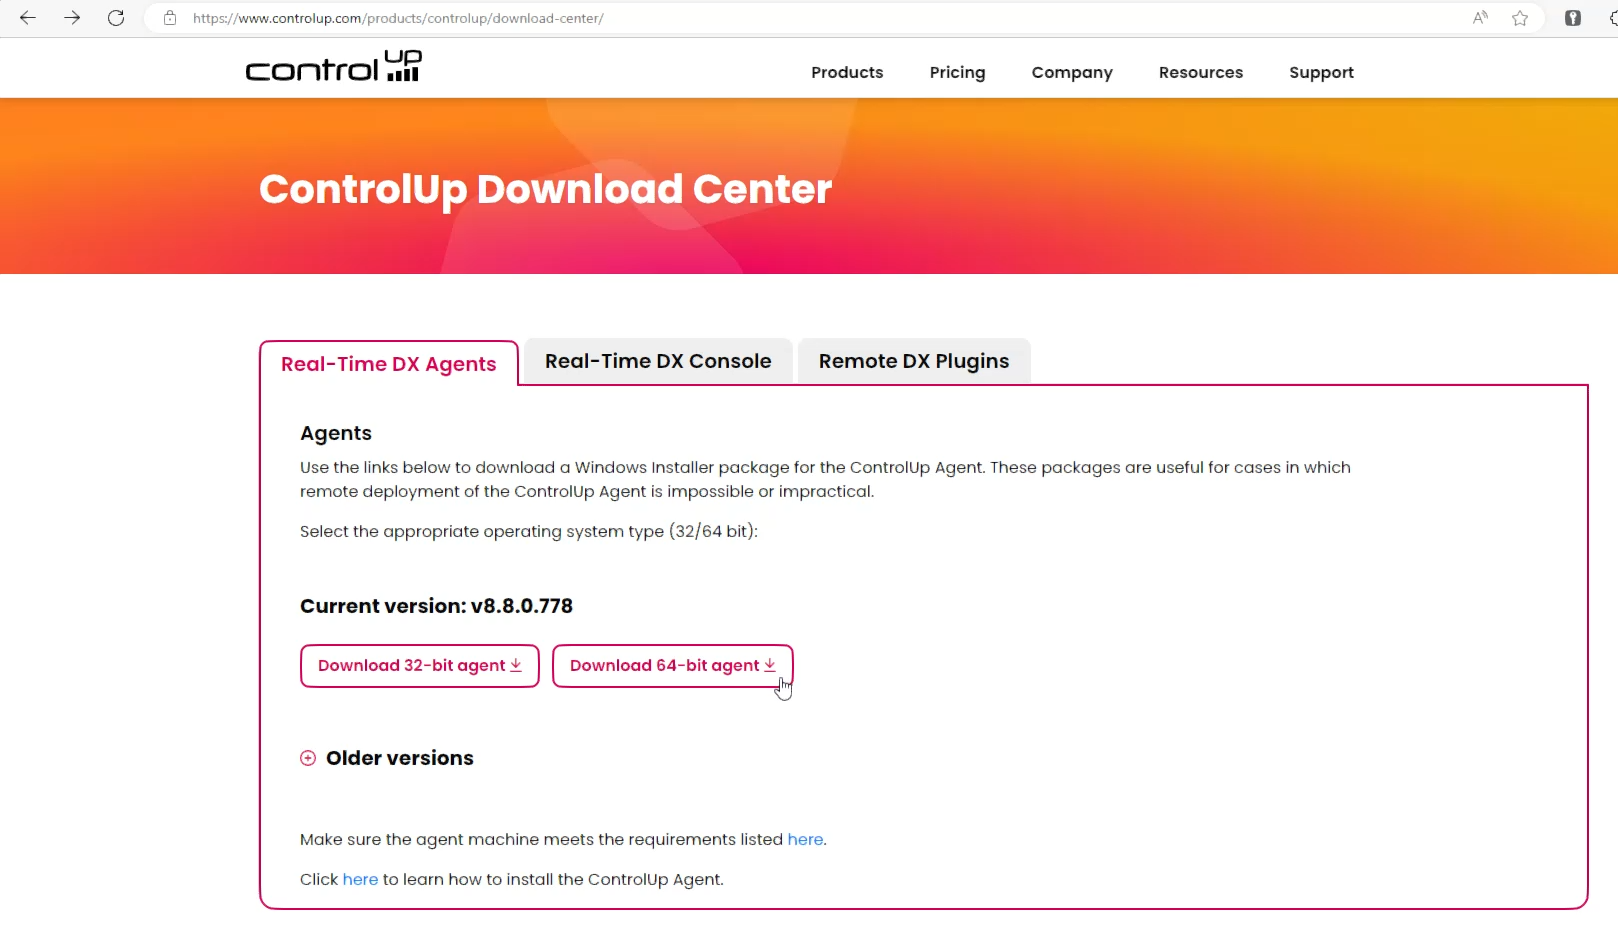
Figure 2: Download the ControlUp for VDI Agent from the ControlUp Download Center.
Within the ControlUp Console, open the Agent Settings and Copy your Authentication Key. This will be required later when making the Intune package.
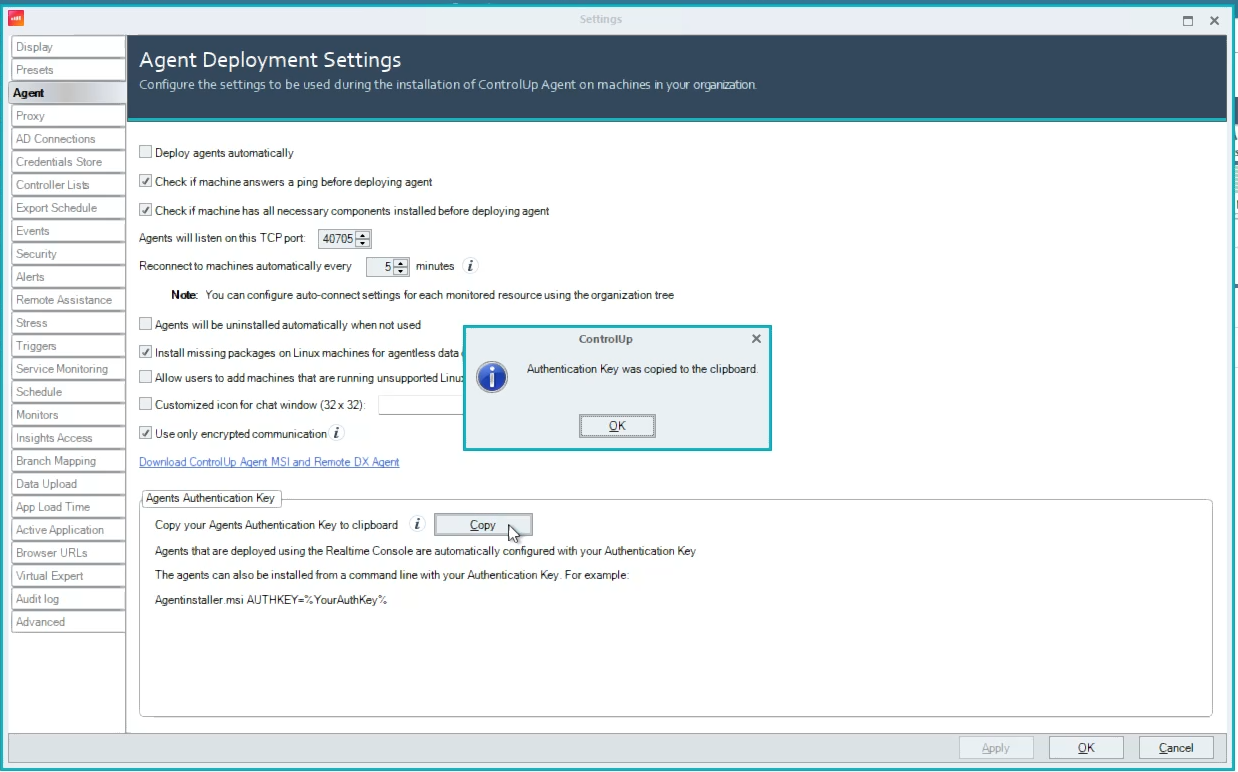
Figure 3: Copy the authentication key from ControlUp.
The IntuneWinAppUtil.exe will create a package to upload into Intune. It will take a folder as an argument and create a single file from the contents of that folder. The folder must include the Real-Time DX agent installer within that folder for the package to operate successfully.
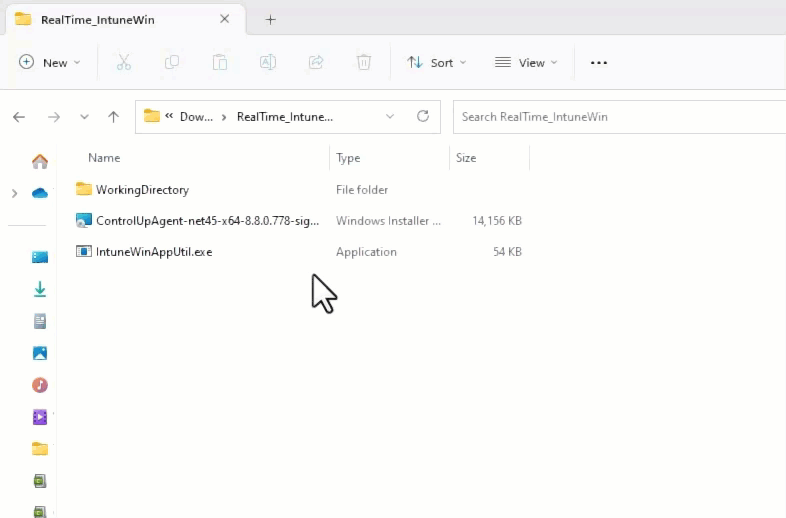
Figure 4: Prepare the working directory by placing the Real-Time DX Agent setup files within the folder.
- Place the ControlUp Real-Time Agent installer in a working folder.
- Run the IntuneWin tool with the parameters:
-c <source_folder>
-s <source_setup_file>
-o <output_folder>
As a result, the the command line string I used looked like the following:

3. The command will report back if it was successful and a new package will appear in your directory with the extension “.intunewin”

Figure 5: The package was created successfully.
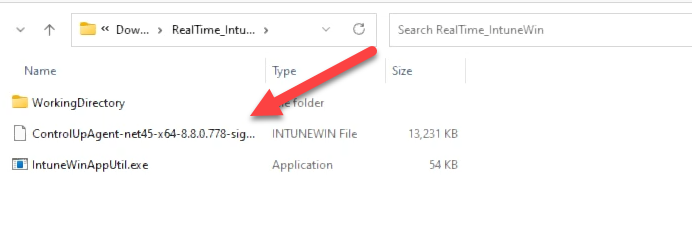
Figure 6: A new file appeared in the directory.
The “.intunewin” package is now ready to be added to Intune.
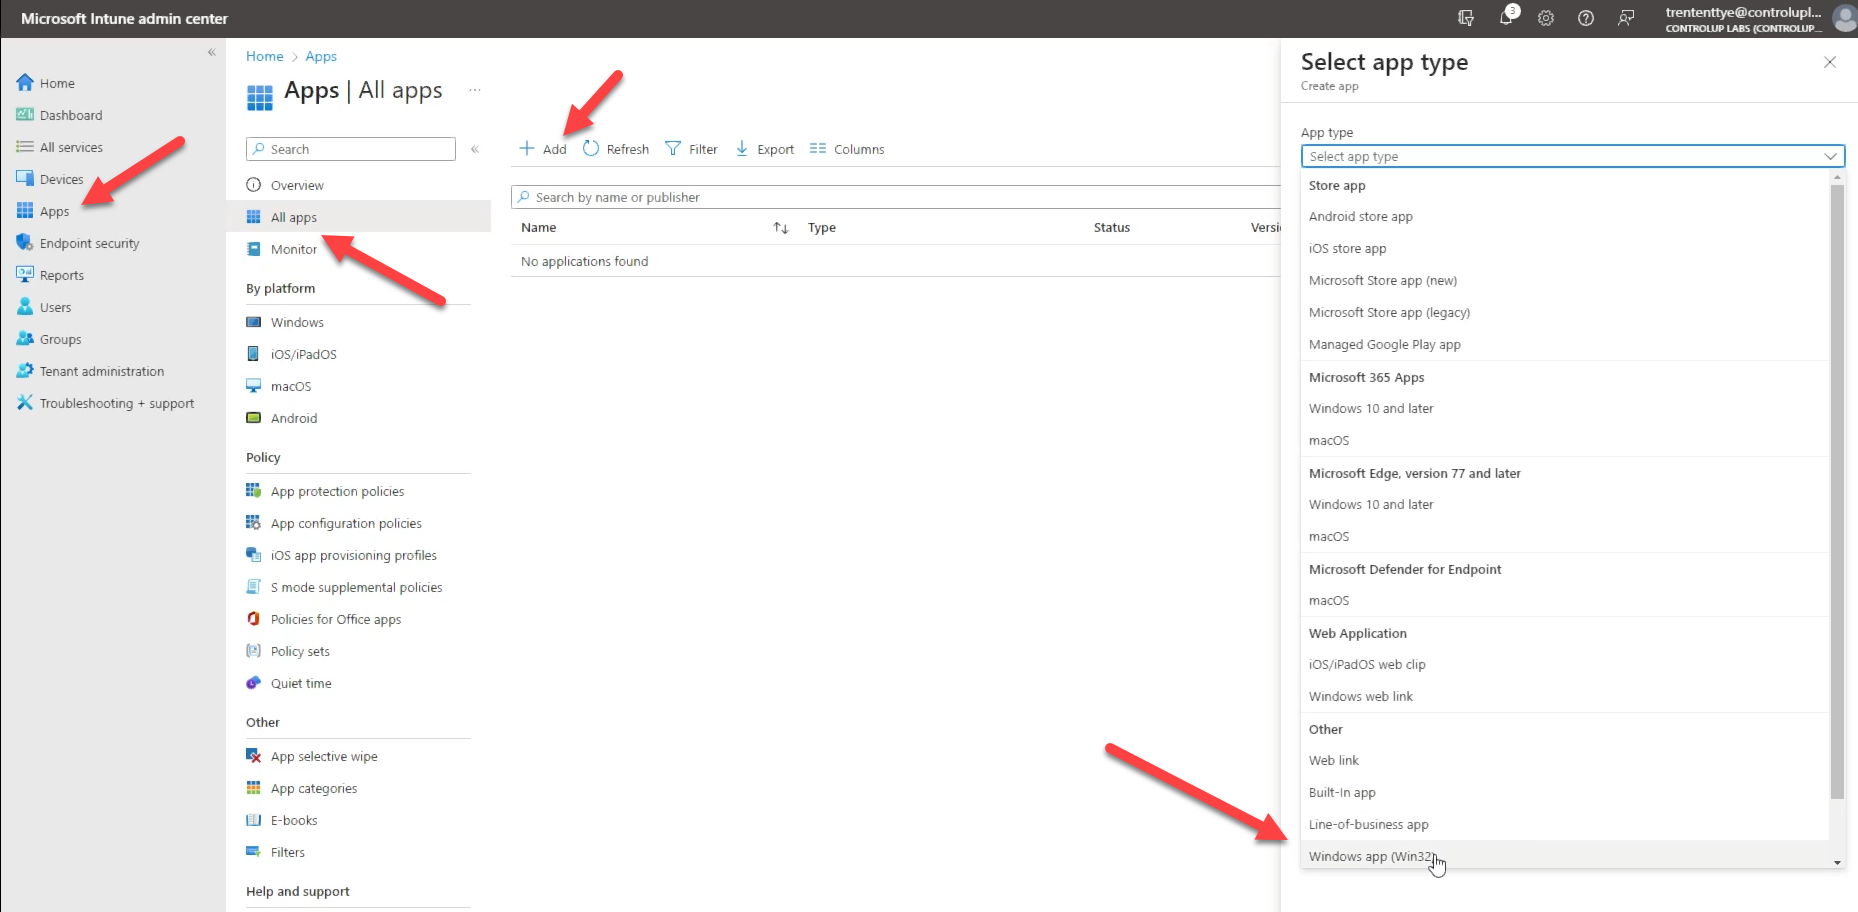
Figure 7: Here are the steps to begin adding an application to Intune.
Within the Microsoft Intune admin center, in the “All Apps” blade under “Apps,” click on +Add. For the App Type, select “Windows app (Win32)” (Figure 7).
In the “Add App” section, under “App information” click on “Select app package file” and click the folder icon. Select the “.intunewin” package that you created earlier.
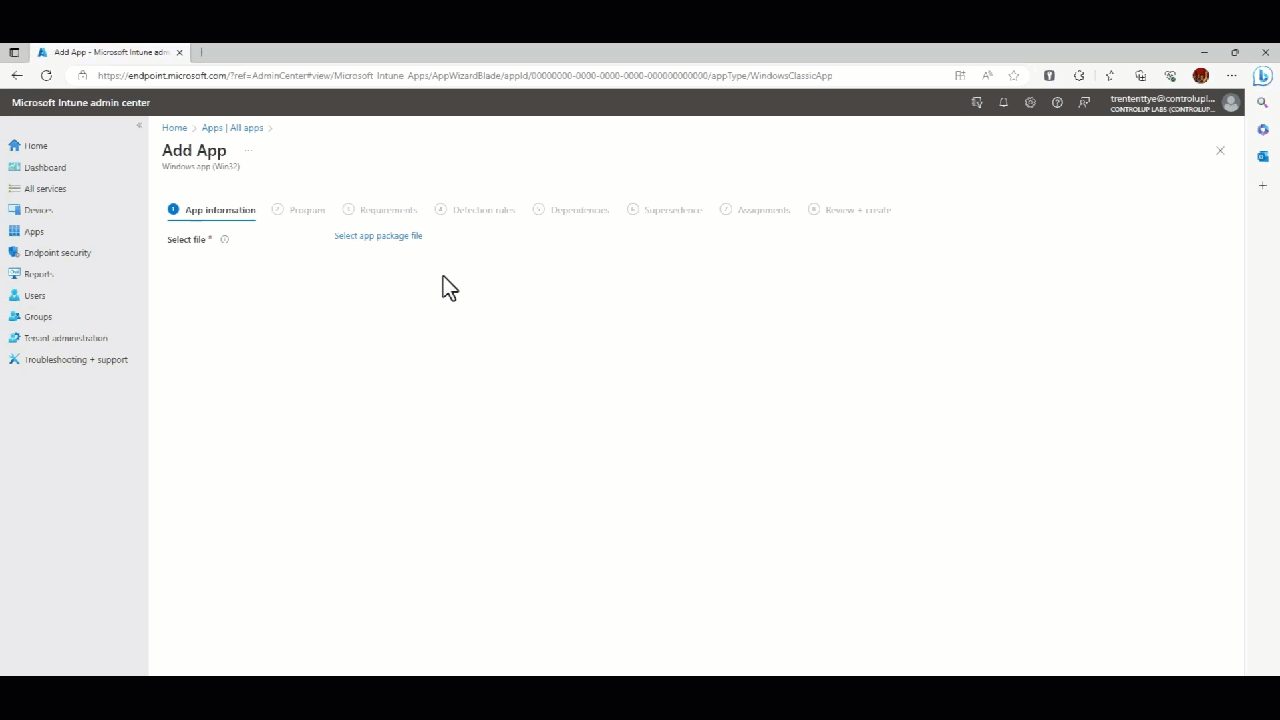
Figure 8: How to select the “intunewin” package.
You can customize the properties of the application to your liking. If you are going to make this a user selectable application to deploy, ControlUp has branding assets you can use to ensure the presented application looks its best. This article will continue with the decision to make the package a mandatory install.
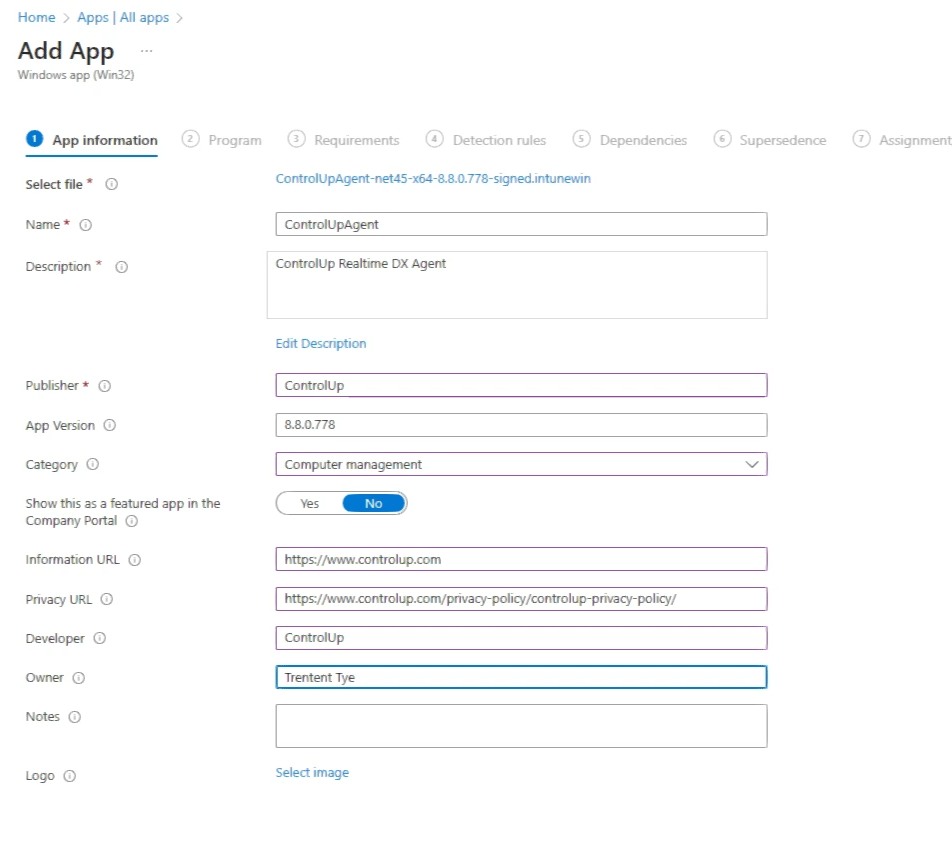
Figure 9: View of the properties of the ControlUp for VDI Agent App added to Intune.
For step 2 of the Add App wizard, you will need to put in the authentication key as copied from the ControlUp Console. The documentation for installing the agent silently can be found here. The ControlUp for VDI agent does not require a restart so the “Device restart behavior” can be set to “No Specific Action”.
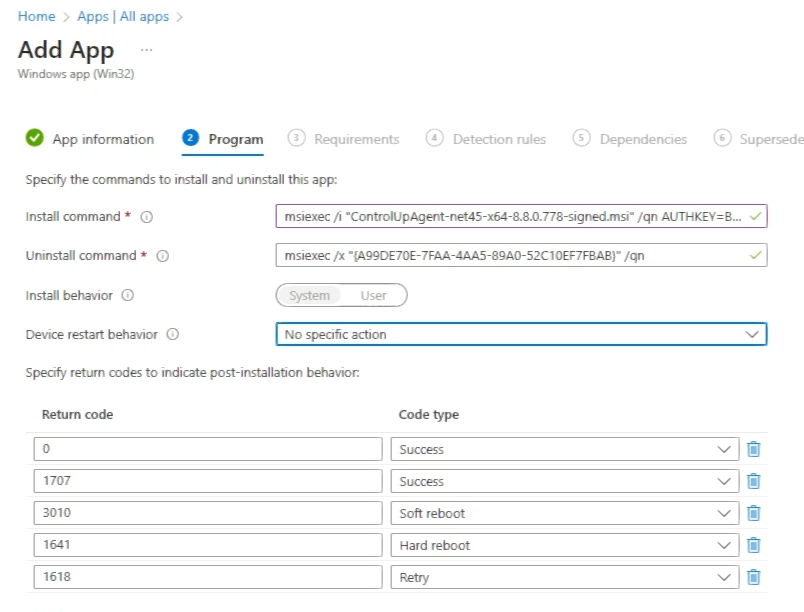
Figure 10: Install command and device restart behavior configuration.
Step 3 of the Add App wizard is defining the application requirements. The ControlUp for VDI agent is optimized for minimal resource consumption so the values you define can reflect that. I’ve defined the values in the screenshot below.
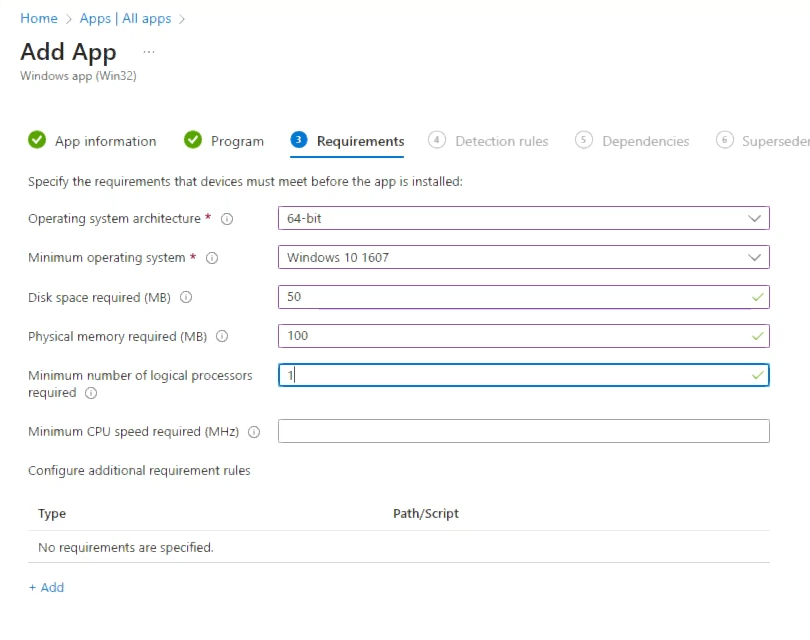
Figure 11: A view of the Application Requirements.
For the Detection Rules you can specify the MSI GUID code as the one to look for to prevent Intune from retrying installation on a machine that already has the ControlUp for VDI agent deployed. The MSI GUID you have may not match the one in this article.
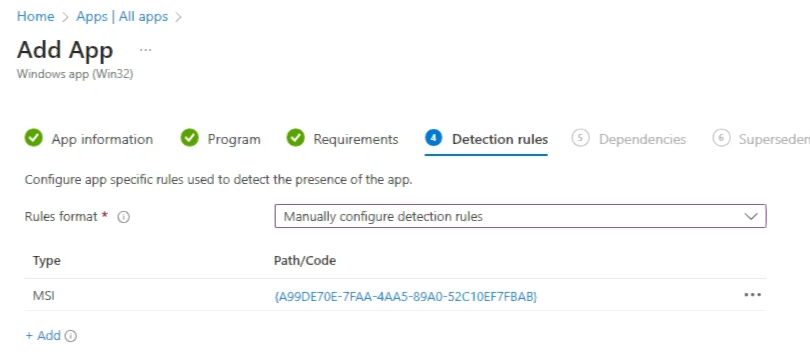
Figure 12: A view of the Detection Rules.
Since this is the first install of the ControlUp for VDI agent and it will be going on a Windows 10 (or newer) machine, no dependencies are required and this version of the agent does not supersede any other version so steps 5 and 6 of the wizard are not applicable.
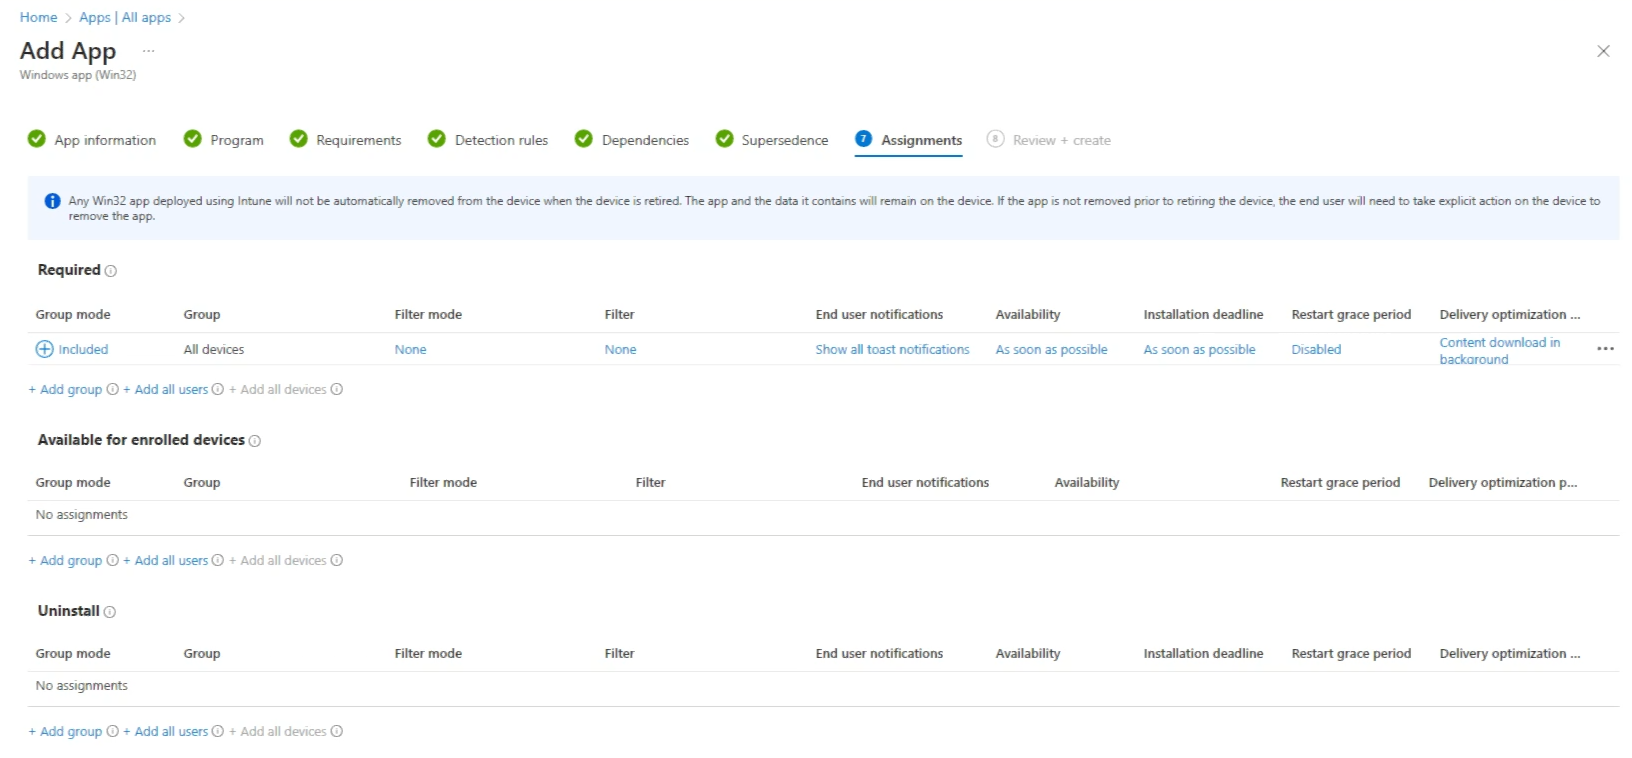
Figure 13: A view of the Assignments.
You can assign the ControlUp for VDI agent however you desire, whether it’s required or just to make it available for self-service. In this article I want to make it a mandatory install so I’ll assign it to all devices under “Required”.
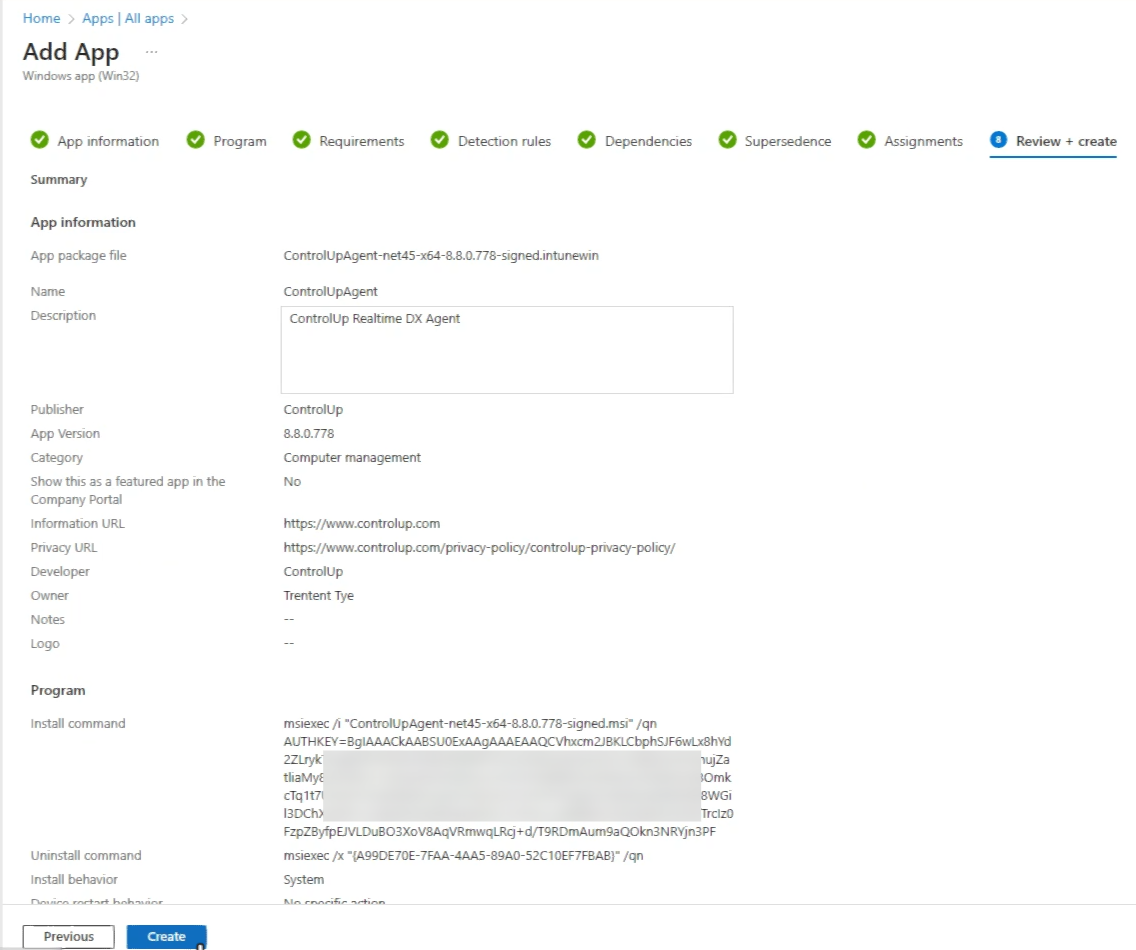
Figure 14: A summary view of Intune as an added application just prior to selecting “Create”.
With the Intune package now created, the machines being managed by Intune will receive the ControlUp for VDI agent the next time the machine checks in with Intune.
If you have ControlUp’s Environment Synchronization setup in your environment the Windows 365 Enterprise Cloud PC will automatically be added to ControlUp.
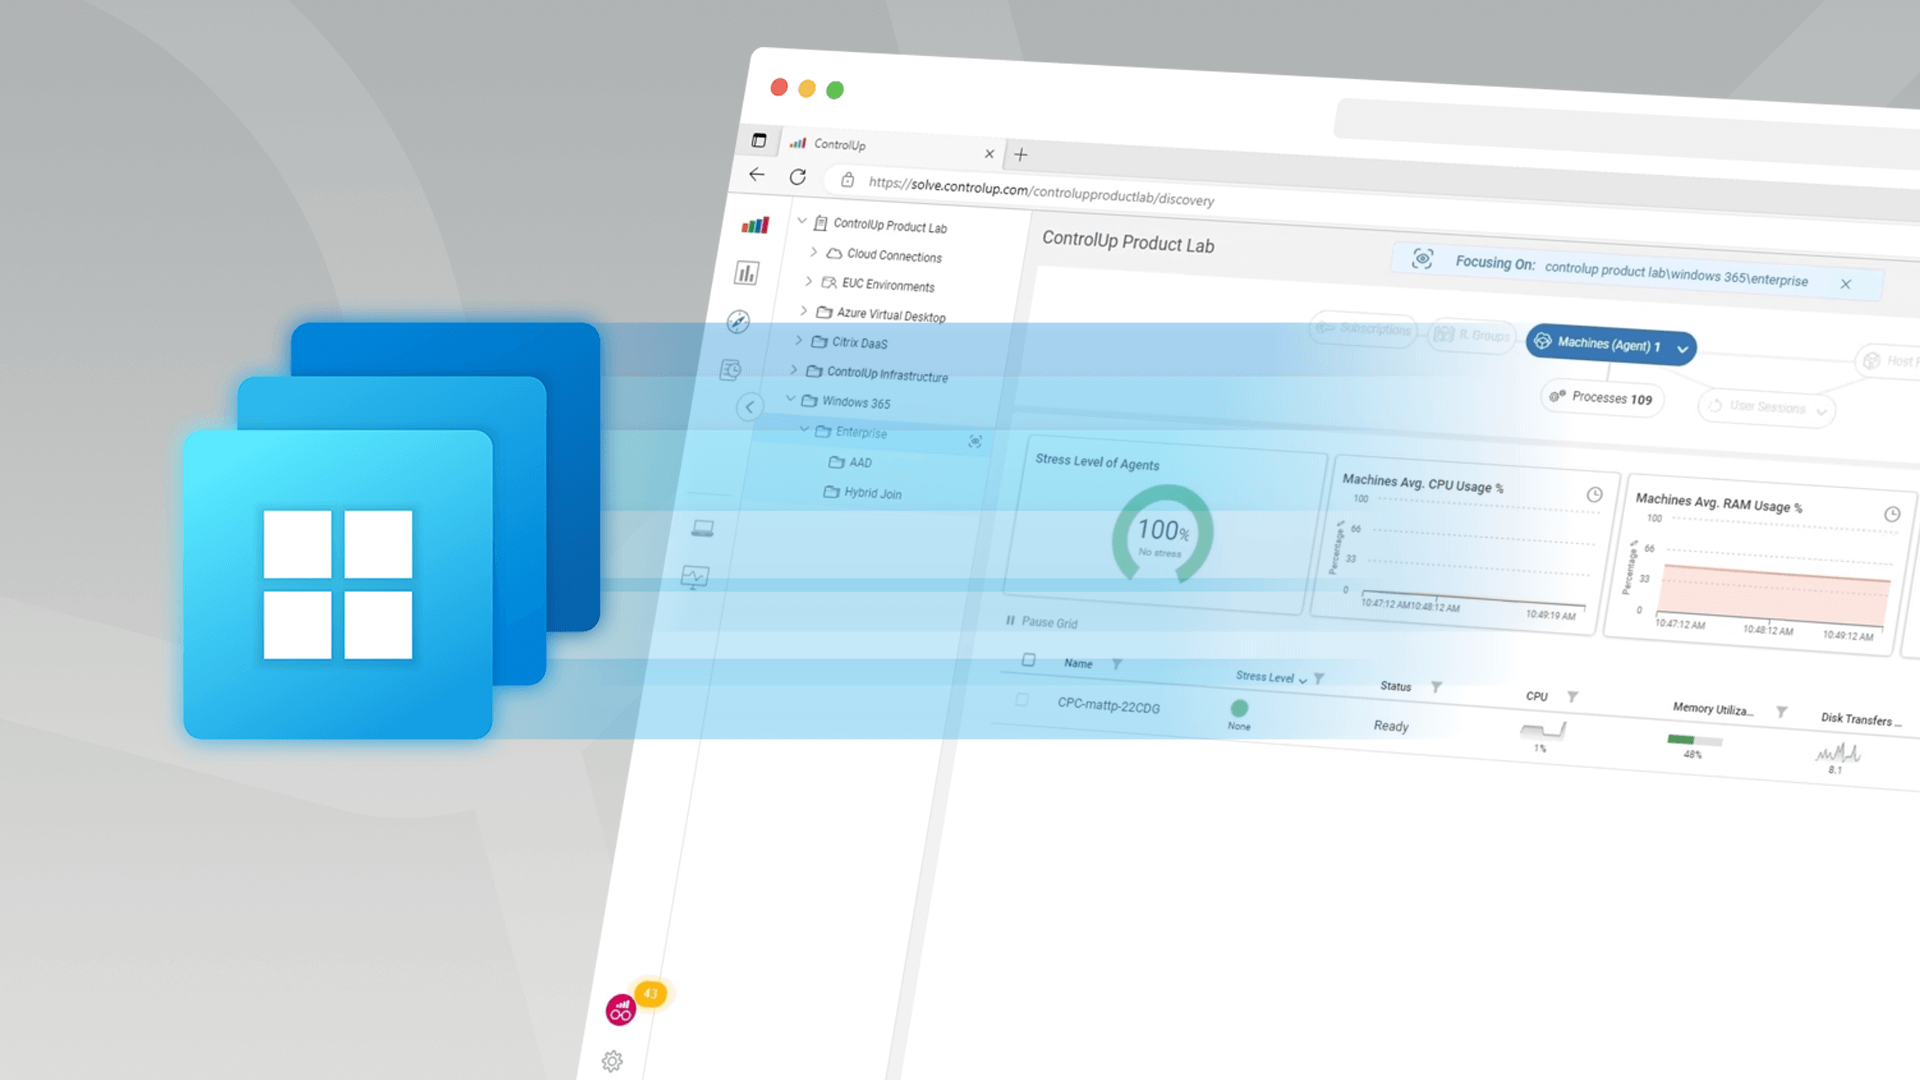
Real-time performance metrics will now be collected, any ControlUp automations you have configured can now execute against the machines, you can now execute remediation actions to resolve any issues and shadowing is now available!
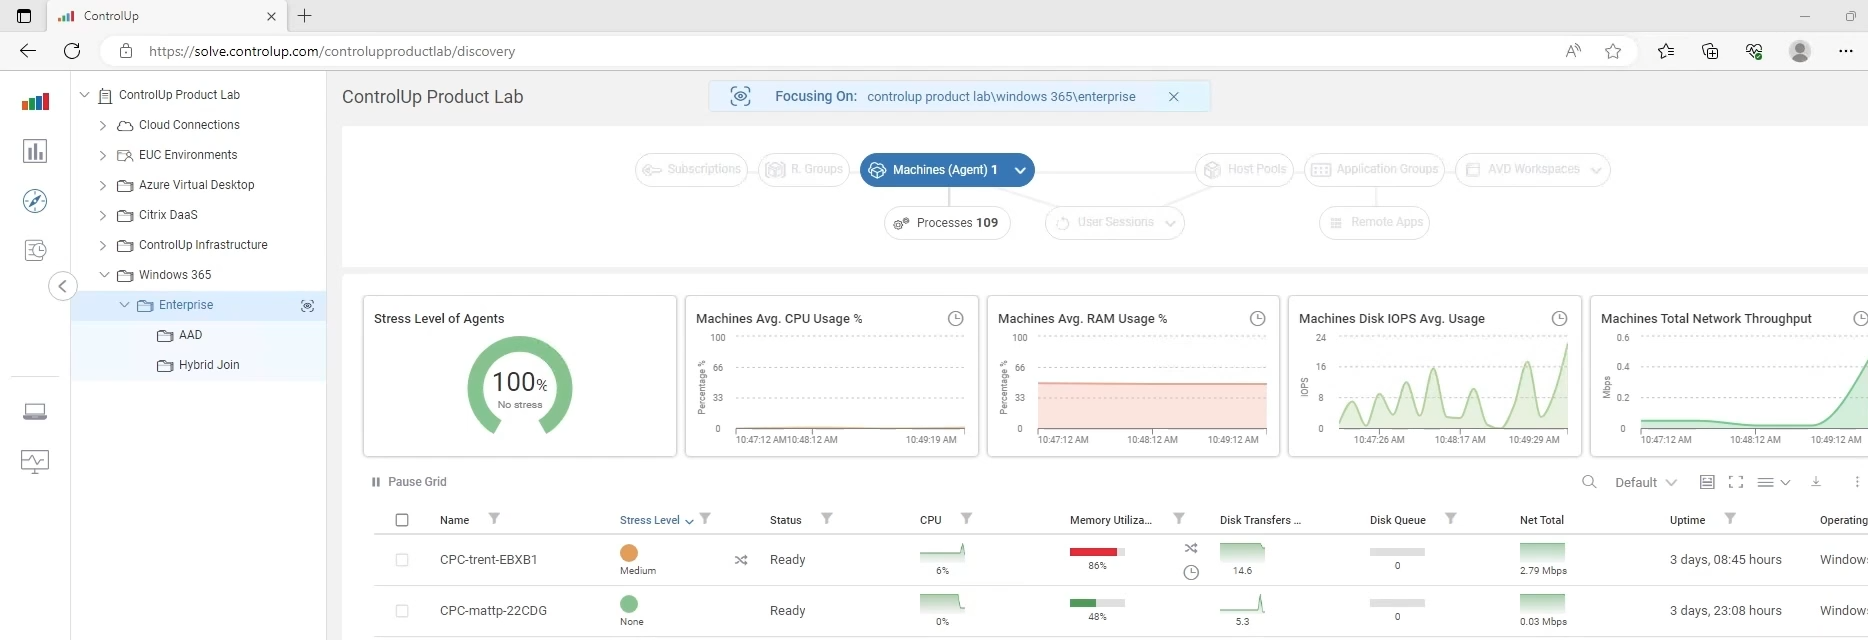
Figure 15: A view of Real-Time DX Monitoring Windows 365 Enterprise Machines.
ControlUp makes it easy to monitor, troubleshoot, and remediate IT issues with your Windows 365 Enterprise Cloud PC machines with ControlUp for VDI. If you’re interested in learning more, See what else ControlUp for VDI can do for you!