In this blog post, I will demonstrate how to use ControlUp for Compliance to create a custom template, schedule daily scans, and automatically remediate issues. Additionally, I will provide more details on ControlUp for Compliance dashboards.
As a quick summary, ControlUp ControlUp for Compliance offers security teams complete visibility into the devices within their environment. This enables a comprehensive evaluation of an organization’s desktop and application security posture and level of exposure, allowing IT to understand and improve their current security landscape. This solution is essential for proactive risk management, enabling organizations to navigate and mitigate threat exposure throughout their entire attack surface. If you’re unfamiliar with ControlUp for Compliance, I recommend reading Eldad’s blog post.
Selecting Your Devices
ControlUp for Compliance only works with machines enrolled with an Edge DX tenant; you should verify that the devices you want to work with in ControlUp for Compliance are on Edge DX. In a previous blog, I used the Getting Started wizard and selected individual devices to work with. However, ControlUp for Compliance can use Edge DX device groups and tags. Working with groups of devices is much easier, so you will want to assign the devices you will be working with device groups and tags.
Using the Alpha-group tag, I assigned the machines I wanted to work with to the PNW-SDX group. This naming scheme allows me to identify the device’s location (PNW-SDX) and a subset of these devices (Alpha-Group). Using subgroups will enable you to work with a small set of devices before implementing changes to a more extensive set of devices.
I clicked the ControlUp for Compliance icon (shield) in the left-hand navigation pane to access ControlUp for Compliance.

This page was empty as I hadn’t yet added devices to ControlUp for Compliance.
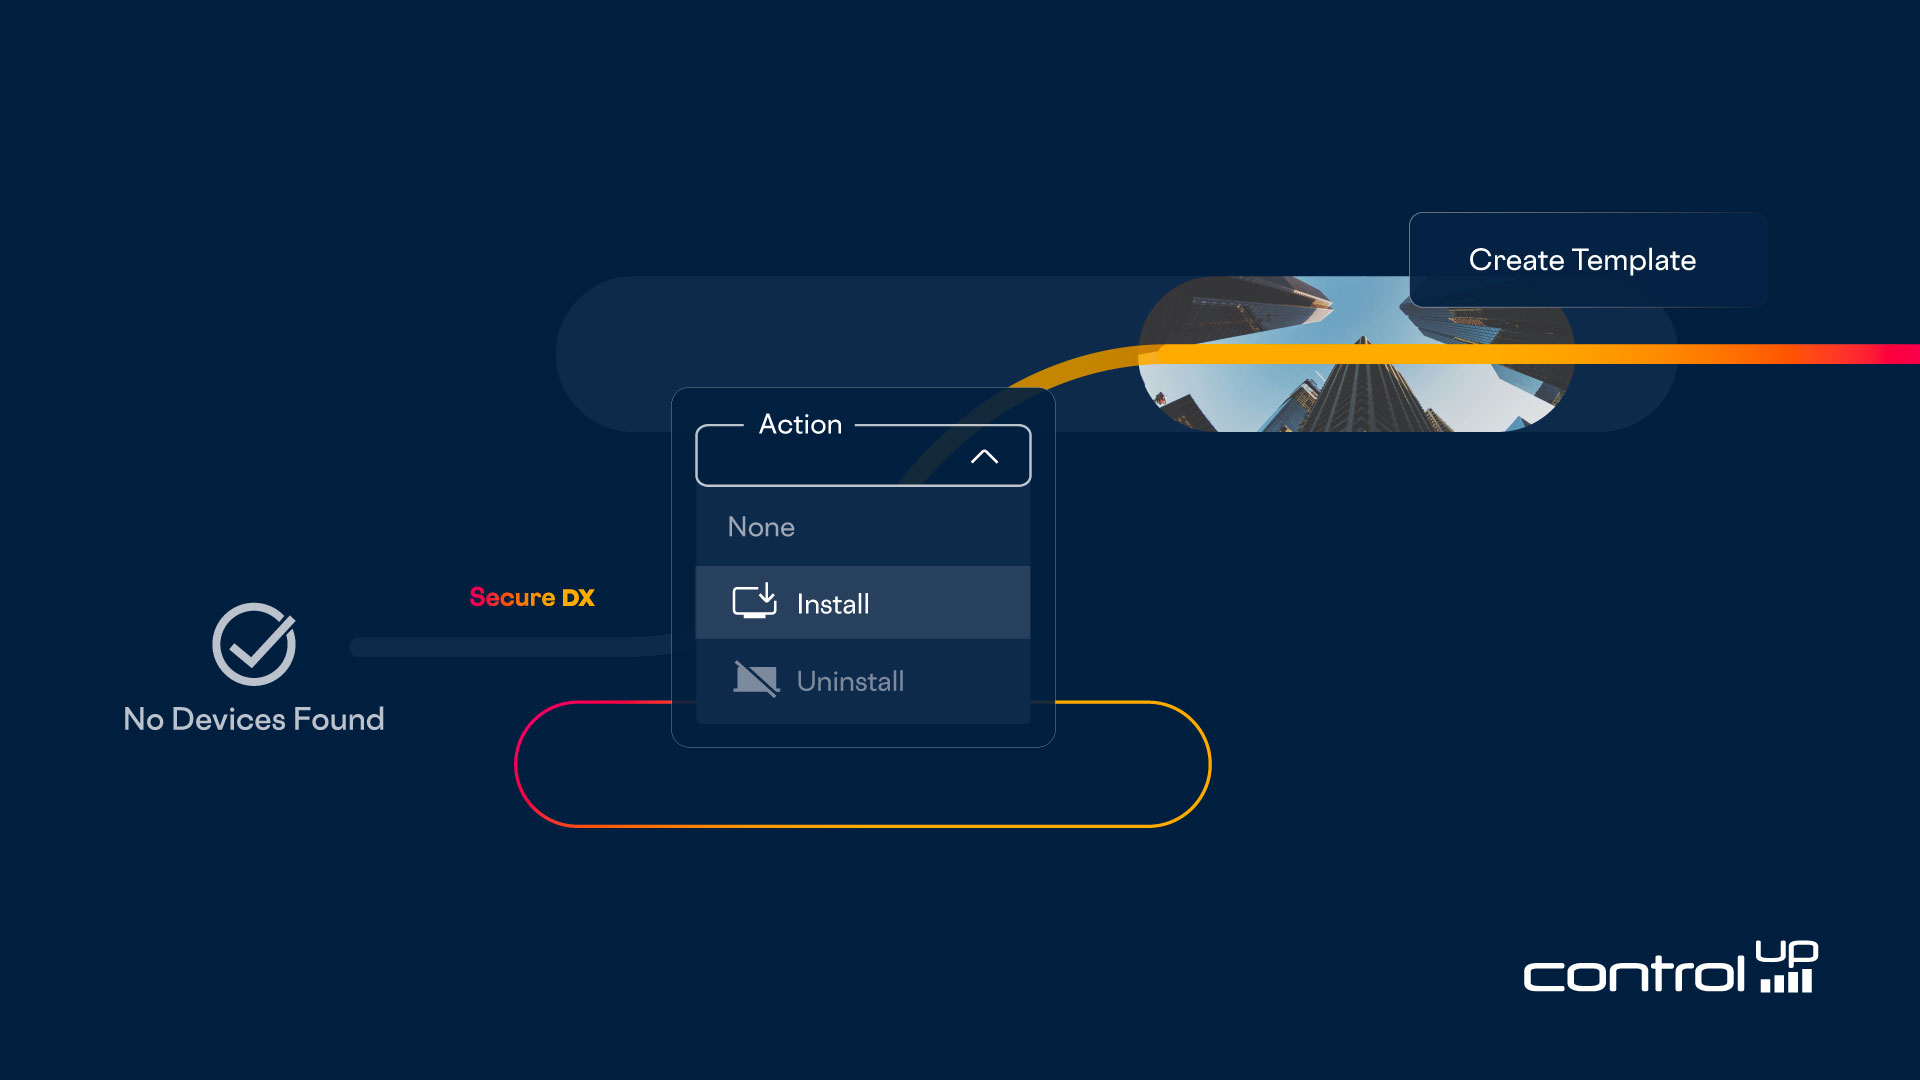
I added devices by clicking the Configuration icon (three horizontal bars) in the upper left.
I then used the filter function to display the devices with the group and tags of the devices I wanted to add to ControlUp for Compliance.
I selected the devices and then selected Install from the Action drop-down menu. This will install the ControlUp for Compliance agent on them.

I clicked the Device tab, and it took a few minutes for the ControlUp for Compliance agent to be deployed and the devices displayed on this dashboard.

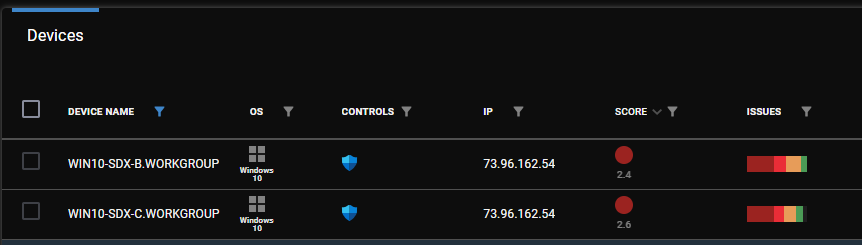
Clicking the Device Name field will bring you to that device’s dashboard. In the left pane, you will see its metadata.
I clicked one of the devices and walked through the tabs (Vulnerabilities, Misconfig, Compliance, etc.), but nothing showed up, as I haven’t yet performed a scan.
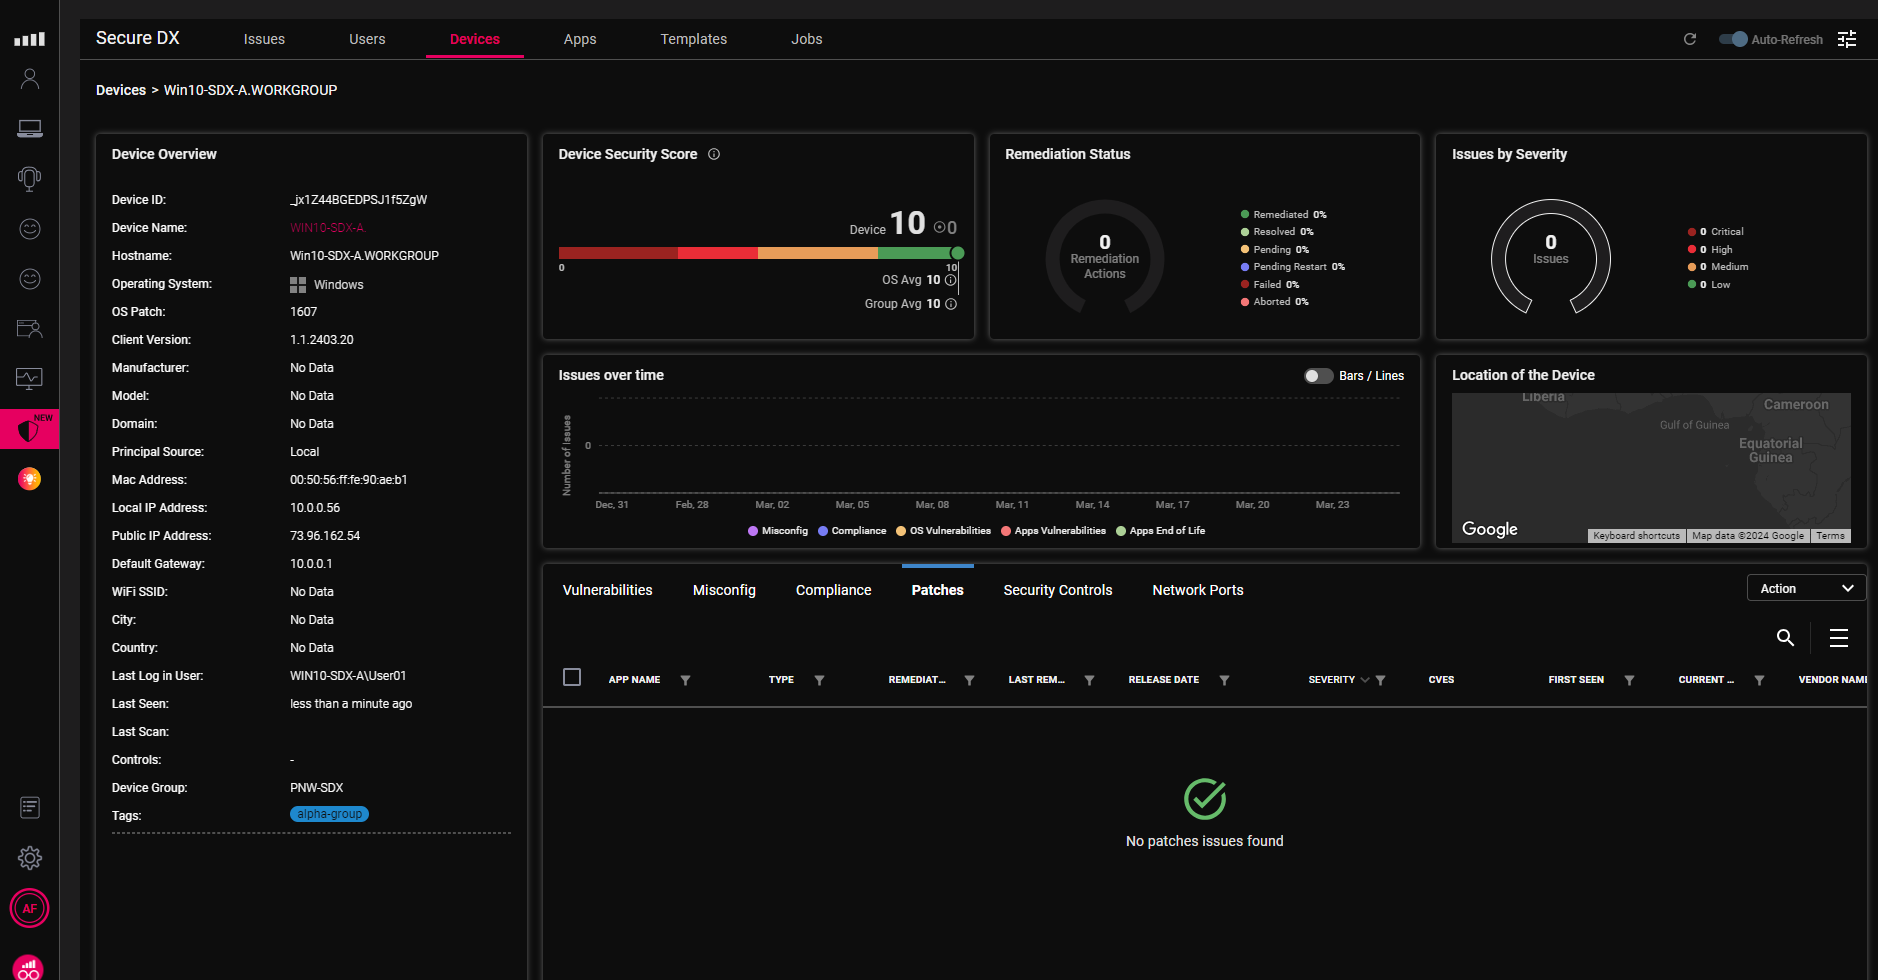
Clicking the Network Ports port showed the opened ports on the device. This grid is updated regularly.
Setting Up a Scan
The power of ControlUp for Compliance is its ability to scan your devices for issues automatically. However, first, you must specify what issues you want to check for. To do this, we use templates.
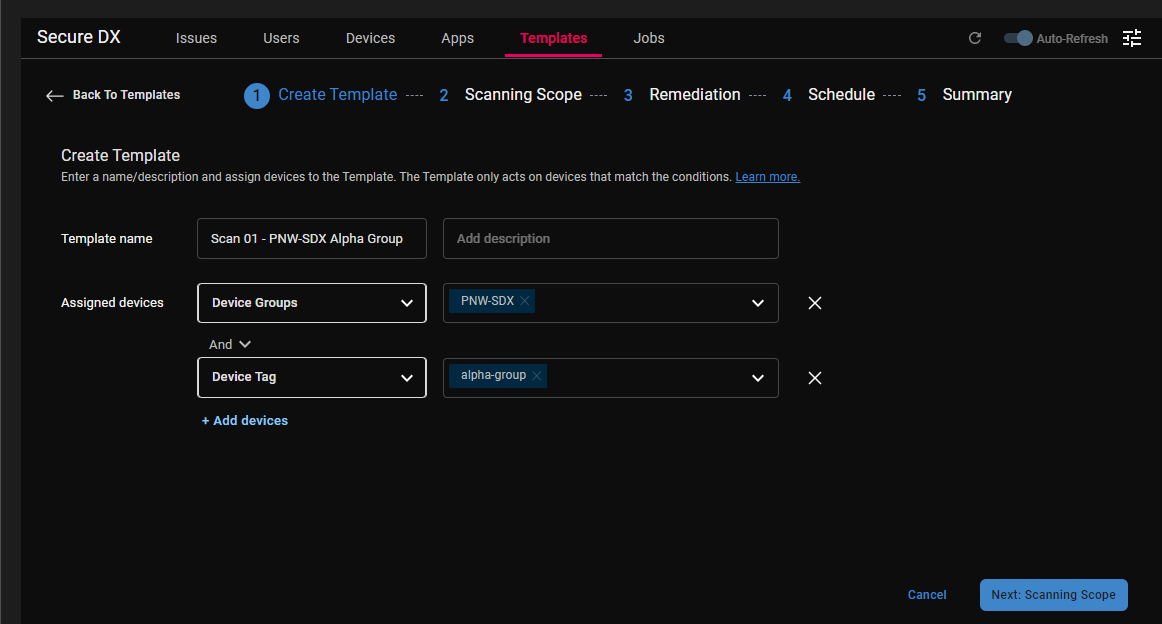
To do this, I clicked the Templates tab at the top of the dashboard and clicked Create Template.

I entered a name for the template that reflects its purpose, selected the device group and tag for the devices I wanted to scan, and clicked Next Scanning Scope.
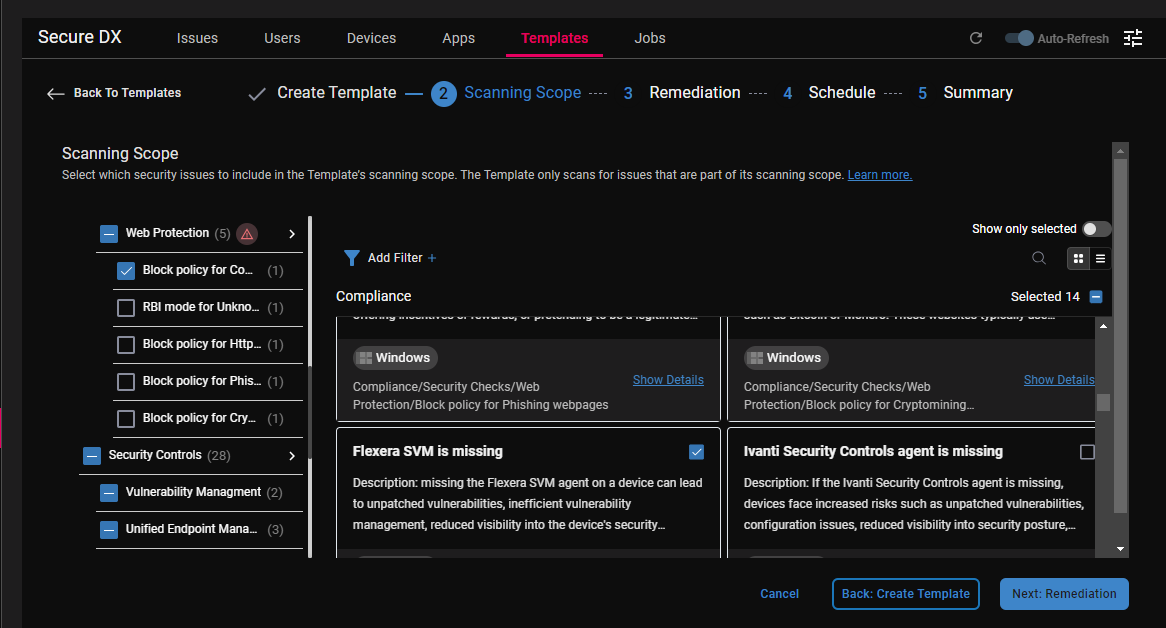
Some descriptions will have alert symbols with more information about what will happen when the scan occurs.

I selected a few items from the misconfiguration, compliance, vulnerability, and patches sections.
NOTE: If you click the upper level of the various sections when new issues to be checked are added, they will also automatically check for those items.
When I clicked Next, I received a message informing me that some scans may set off some security products (see comment above). After informing my security team that a scan would take place, I clicked OK.

On the remediation page, I clicked Disabled. I suggest you do the same, as you want to know what will be performed before automating this process. Once you see what it will do, it is straightforward to edit a template.
NOTE: Use caution when remediating issues, as they may have unintended consequences!
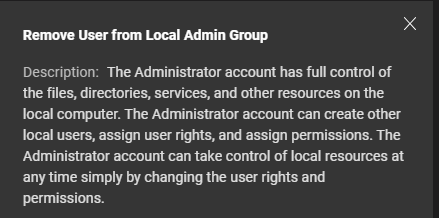
For example, in Security Checks under Compliance, you have the option to remove the user from the local admin group. This is a very powerful remediation, but if the device does have a user with administration rights outside of the local admin group and you remove the rights to the local admin users, you will not have a user with admin rights on that device!
I scheduled my scan to take place at night so as not to bother any users, and I opted to message them before the scan.

After clicking Next, I verified what the scan would do, that it would not remediate any issues, and that a message would be sent to the users before the scan started. I then clicked Submit.
On the template’s dashboard, I saw the scan that I created.

I verified that the download and installation schedules were blank, as I didn’t want any remediation to occur now.
I know you are excited to see the results of your first ControlUp for Compliance scan, so in the next section, I will show you how to run a template scan immediately on a device!
Now, we get to the fun part: scanning your devices for issues!
Immediately Scanning a Device
Although we set up a schedule for scanning our devices, we can also scan them manually. I find this useful when I create a new template and want to verify it.
There are a couple of different ways to do this.
Completely Scanning One or Multiple Devices
You can thoroughly scan one or multiple devices from the device’s dashboard.
To scan one or more devices, select the checkbox on the left of the row and then select Scan from the Action drop-down menu.

This will scan for the issues that are specified in its template. If a device is defined in multiple templates, all issues in all of them will be checked.
Scanning for Specific Issues
You can also scan for specific issues on a device. For example, you may want to scan a particular device to ensure it uses the latest application version.
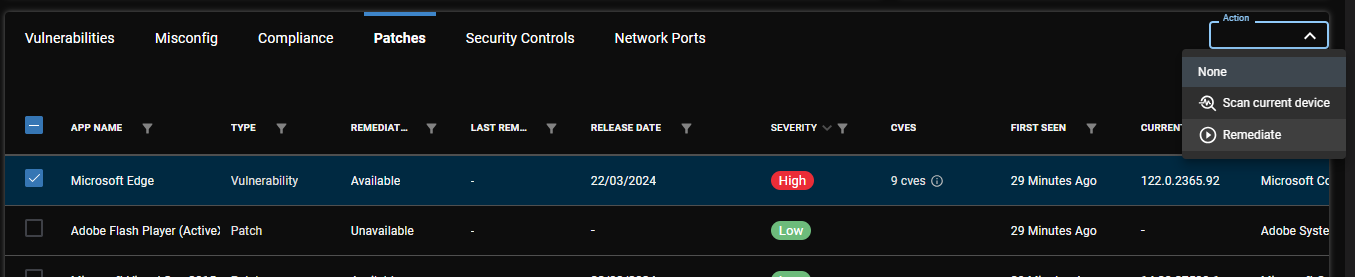
To do this, select the Device tab and choose the device you want to scan. Click the Patches tab, select the applications you want to check, and then select Scan current device from the Action drop-down menu.

A popup will indicate that a scan has been initiated. You can repeat this process for misconfigurations and compliance issues as well.
Immediately Remediating Issues
I encountered a high-severity issue with MS Edge that needed to be remediated immediately.
In the patches grid of the device, I selected Edge and then selected Remediate from the Actions drop-down menu.
This brought up the job creation wizard. I configured the job to remediate the issue immediately and submitted the job.

The remediation was shown as in progress and then pending in the patches grid.

A few minutes later, the Edge DX row disappeared, indicating that the issue had been remediated.
After the Scan
The following day, after the scheduled template had scanned all the devices, each device was given a score, and a bar graph showed its number of issues.
Five days later I edited the template to remediate the issues I wanted to address. That night, these issues were addressed.
A Few Weeks Later
The Issues Over Time widget on the Issues dashboard showed dramatically decreased issues with the device in my environment. Over the past few days, the number of issues started to creep up again as I added additional devices to my environment and checked for additional issues.

Another power of ControlUp for Compliance is smart prioritization. You can go to the various tabs and sort their grids by the scores column to immediately identify the issues, users, devices, and applications that need the most attention.

ControlUp for Compliance is an ideal tool for extending end-to-end visibility of issues on the devices in your environment. This equips IT teams to grasp their current security landscape and elevate it to new heights by enabling a thorough assessment of security posture and exposure. It can be a cornerstone for proactive risk management, empowering organizations to navigate and mitigate threat exposure across their entire attack surface.
For more information on ControlUp for Compliance or any of our other award-winning products or to schedule a personal demo, click here.